All Products

All Products The Quality Policy of SKG Project & Engg. Pvt. Ltd. (SKG) is to achieve self and customers' satisfaction by providing reliable, consistent, test results of building materials in accordance with national / international / customer specific standards and good professional practices, as per the needs of its customers. Ensuring Quality & Safety Worldwide

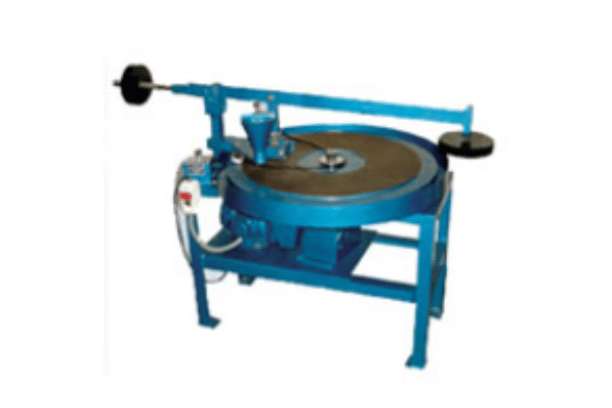
Aggregate Testing Instruments

The Roofing Repair Services of Company keep you protection keep you moving forward the best of roof.

All Products The Quality Policy of SKG Project & Engg. Pvt. Ltd. (SKG) is to achieve self and customers' satisfaction by providing reliable, consistent, test results of building materials in accordance with national / international / customer specific standards and good professional practices, as per the needs of its customers. Ensuring Quality & Safety Worldwide

General Lab Equipments

The Roofing Repair Services of Company keep you protection keep you moving forward the best of roof.
All Products The Quality Policy of SKG Project & Engg. Pvt. Ltd. (SKG) is to achieve self and customers' satisfaction by providing reliable, consistent, test results of building materials in accordance with national / international / customer specific standards and good professional practices, as per the needs of its customers. Ensuring Quality & Safety Worldwide

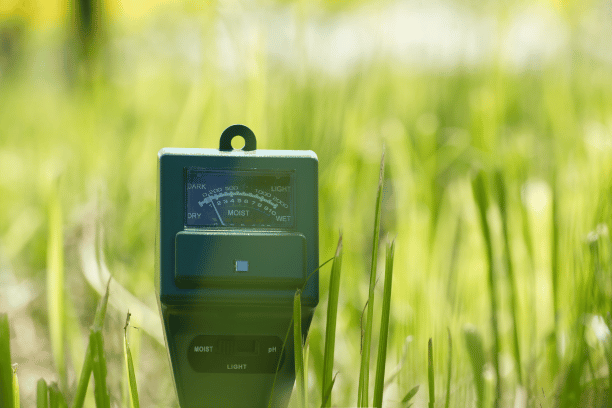
Moisture Meter

The Roofing Repair Services of Company keep you protection keep you moving forward the best of roof.

All Products The Quality Policy of SKG Project & Engg. Pvt. Ltd. (SKG) is to achieve self and customers' satisfaction by providing reliable, consistent, test results of building materials in accordance with national / international / customer specific standards and good professional practices, as per the needs of its customers. Ensuring Quality & Safety Worldwide

Soil Testing Instruments

The Roofing Repair Services of Company keep you protection keep you moving forward the best of roof.
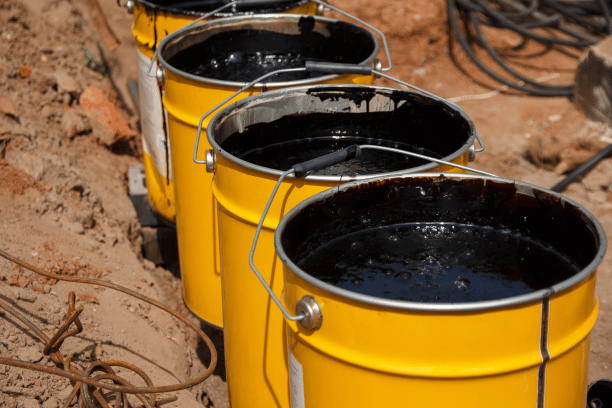
All Products The Quality Policy of SKG Project & Engg. Pvt. Ltd. (SKG) is to achieve self and customers' satisfaction by providing reliable, consistent, test results of building materials in accordance with national / international / customer specific standards and good professional practices, as per the needs of its customers. Ensuring Quality & Safety Worldwide

Bitumen Testing Instruments

The Roofing Repair Services of Company keep you protection keep you moving forward the best of roof.
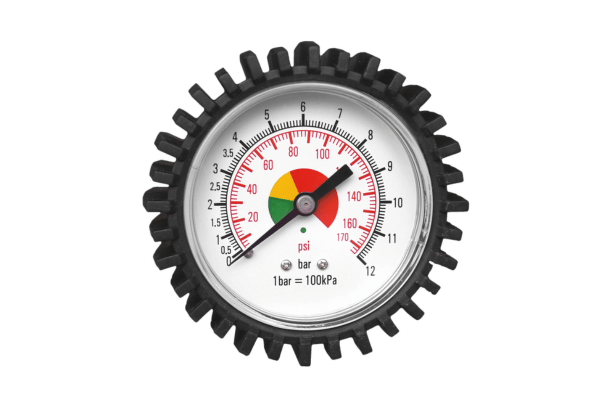
All Products The Quality Policy of SKG Project & Engg. Pvt. Ltd. (SKG) is to achieve self and customers' satisfaction by providing reliable, consistent, test results of building materials in accordance with national / international / customer specific standards and good professional practices, as per the needs of its customers. Ensuring Quality & Safety Worldwide

Measuring Instruments

The Roofing Repair Services of Company keep you protection keep you moving forward the best of roof.

All Products The Quality Policy of SKG Project & Engg. Pvt. Ltd. (SKG) is to achieve self and customers' satisfaction by providing reliable, consistent, test results of building materials in accordance with national / international / customer specific standards and good professional practices, as per the needs of its customers. Ensuring Quality & Safety Worldwide

Road Pavement Testing Instruments

The Roofing Repair Services of Company keep you protection keep you moving forward the best of roof.
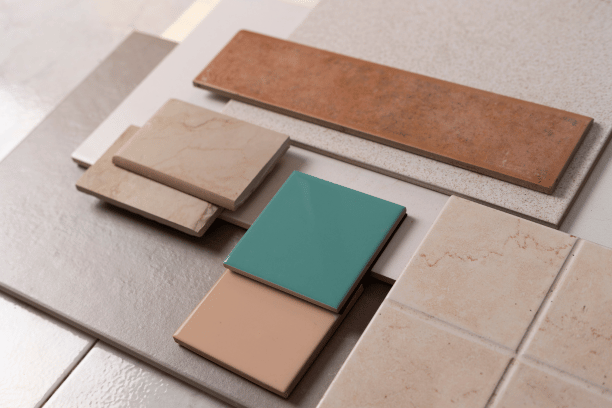
All Products The Quality Policy of SKG Project & Engg. Pvt. Ltd. (SKG) is to achieve self and customers' satisfaction by providing reliable, consistent, test results of building materials in accordance with national / international / customer specific standards and good professional practices, as per the needs of its customers. Ensuring Quality & Safety Worldwide

Tile Testing Instruments

The Roofing Repair Services of Company keep you protection keep you moving forward the best of roof.
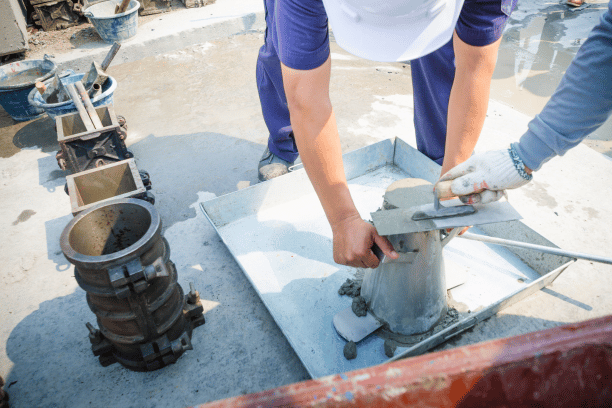
All Products The Quality Policy of SKG Project & Engg. Pvt. Ltd. (SKG) is to achieve self and customers' satisfaction by providing reliable, consistent, test results of building materials in accordance with national / international / customer specific standards and good professional practices, as per the needs of its customers. Ensuring Quality & Safety Worldwide

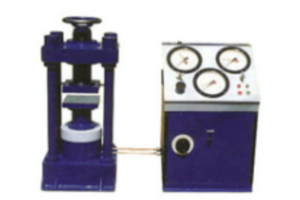
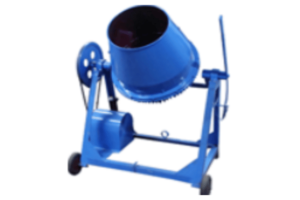
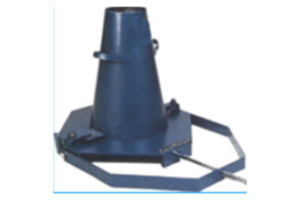
Concrete Testing Instruments

The Roofing Repair Services of Company keep you protection keep you moving forward the best of roof.
All Products The Quality Policy of SKG Project & Engg. Pvt. Ltd. (SKG) is to achieve self and customers' satisfaction by providing reliable, consistent, test results of building materials in accordance with national / international / customer specific standards and good professional practices, as per the needs of its customers. Ensuring Quality & Safety Worldwide

Non Destructive Testing Instruments

The Roofing Repair Services of Company keep you protection keep you moving forward the best of roof.

All Products The Quality Policy of SKG Project & Engg. Pvt. Ltd. (SKG) is to achieve self and customers' satisfaction by providing reliable, consistent, test results of building materials in accordance with national / international / customer specific standards and good professional practices, as per the needs of its customers. Ensuring Quality & Safety Worldwide

Rock-Testing-Instruments

The Roofing Repair Services of Company keep you protection keep you moving forward the best of roof.
All Products The Quality Policy of SKG Project & Engg. Pvt. Ltd. (SKG) is to achieve self and customers' satisfaction by providing reliable, consistent, test results of building materials in accordance with national / international / customer specific standards and good professional practices, as per the needs of its customers. Ensuring Quality & Safety Worldwide

Cement Testing Instruments

The Roofing Repair Services of Company keep you protection keep you moving forward the best of roof.

We Ensure Accuracy & Reliability

All Products The Quality Policy of SKG Project & Engg. Pvt. Ltd. (SKG) is to achieve self and customers' satisfaction by providing reliable, consistent, test results of building materials in accordance with national / international / customer specific standards and good professional practices, as per the needs of its customers. Ensuring Quality & Safety Worldwide

Customization

All Products The Quality Policy of SKG Project & Engg. Pvt. Ltd. (SKG) is to achieve self and customers' satisfaction by providing reliable, consistent, test results of building materials in accordance with national / international / customer specific standards and good professional practices, as per the needs of its customers. Ensuring Quality & Safety Worldwide

100% SATISFACTION GUARANTEED

All Products The Quality Policy of SKG Project & Engg. Pvt. Ltd. (SKG) is to achieve self and customers' satisfaction by providing reliable, consistent, test results of building materials in accordance with national / international / customer specific standards and good professional practices, as per the needs of its customers. Ensuring Quality & Safety Worldwide

Good After-Sales Services

All Products The Quality Policy of SKG Project & Engg. Pvt. Ltd. (SKG) is to achieve self and customers' satisfaction by providing reliable, consistent, test results of building materials in accordance with national / international / customer specific standards and good professional practices, as per the needs of its customers. Ensuring Quality & Safety Worldwide

On Time Guarantee

Quality

The Quality Policy of SKG Project & Engg. Pvt. Ltd. (SKG) is to achieve self and customers’ satisfaction by providing reliable, consistent, test results of building materials in accordance with national / international / customer specific standards and good professional practices, as per the needs of its customers.

SKG follows good professional practices by use of appropriate tests / methods, standard reference materials, calibrated equipment, and trained personnel and shall endeavor to provide efficient services to its customers and take actions to enhance their satisfaction.

SKG is committed to improve services provided to customers complying with requirements of regulatory bodies and providing resources for quality services and training to all employees to be aware of Quality management system and implement quality policy and procedures in their work.

SKG is further committed to be fully responsible and Accountable towards successful implementation of quality management systems by meeting the requirements of ISO/IEC9001:2008.

What our happy customers are talking

Best experience with testing of construction material and chemicals. Very cooperative, understanding and efficient employees

Jerrin Jose

This laboratory is best of concrete testing this is nabl good service and good behavior every staff and senior person

Anand Kumar

Good place to Test Materials.

Sumeet Kumar Satpathy
Scroll to Top

Aggregate Testing Instruments

AGGREGATE TESTING INSTRUMENTS

AGGREGATE TESTING INSTRUMENTS

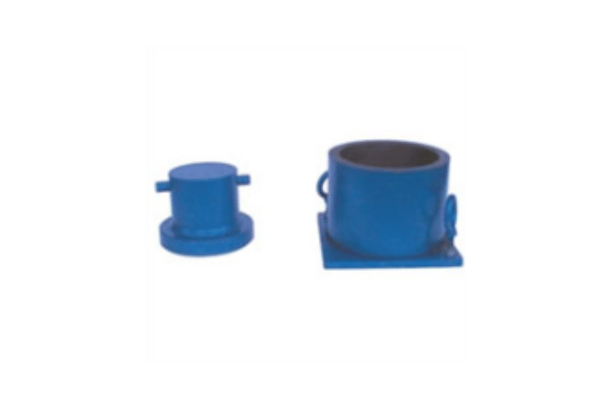
Aggregate Crushing Value Apparatus. 150 Mm Dia Cylinder

As Per IS 9376-1979 & IS 2386 (Part IV) – 1963.
For measuring resistance of aggregates to crushing.

Consist of a cylinder
1. Diameter: 150mm ± 0.5 mm
2. Height: 130 mm to 140 mm open ended
3. Material: Steel
4. Base plate: 200 to 230 mm² x 6 mm thick
5. Plunger of 148 mm ± 0.5 mm Dia x 100 to 111.5 mm High.

Porta tellus aliquam ligula sollicitudin

Lorem ipsum dolor sit amet, consectetur adipiscing elit, sed do eiusmod tempor incididunt ut labore et dolore magna aliqua. Ut enim ad minim veniam, quis nostrud exercitation ullamco laboris nisi ut aliquip ex ea commodo consequat.
” Lorem ipsum dolor sit amet, consectetur adipiscing elit, sed do eiusmod tempor incididunt ut labore et dolore magna aliqua. Ut enim ad minim veniam, quis nostrud exercitation ullamco laboris nisi ut aliquip ex ea commodo consequat. “

Tincidunt wisi euismod iaculis nunc vita

Nostra dapibus varius et semper semper rutrum ad risus felis eros. Cursus libero viverra tempus netus diam vestibulum lorem tincidunt congue porta. Non ligula egestas commodo massa. Lorem non sit vivamus convallis elit mollis. Viverra sodales feugiat natoque sem morbi hac nunc ultricies nibh netus facilisis blandit. Felis purus et iaculis. Semper orci duis montes curabitur potenti a varius quis diam, vel litora et? Quis ridiculus pharetra luctus augue duis.

Parturient tortor tortor sed tellus molestie neque

1. Base Weight: 22 30 kg. With a lower surface of not less than 30cm with support columns to form a rigid frame work around the quick release trigger mechanism to ensure an effective free fall of the hammer during test. The free fall can be adjusted through 380 ± 5mm. The hammer is provided with a locking arrangement.

2. A Metal Tup (Hammer) Weight: 13.5 to 14 kg. The lower end is cylindrical in shape with 100 mm Dia x 50 mm Long with 2mm chamfer at the lower end and case hardened.

3. Cylindrical Cup: 102mm Dia x 50mm Depth, One measure of 75mm Dia x 50mm Deep and a Tamping Bar (10 mm Dia x 230 mm Long) of circular cross section, rounded at one end. Complete with Automatic Blow Counter.

Consist of a base

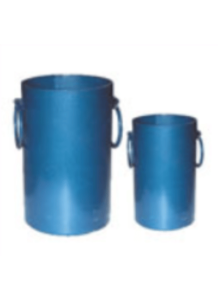
Used to determine the bulk density or unit weight of aggregates. Made of heavy gauge sheet fitted with handle.
Set of three measures of 3 Ltr, 15 Ltr, and 30 Ltr. Capacity

As Per IS 2386 (PART III) 1963.

For density tests on aggregates.
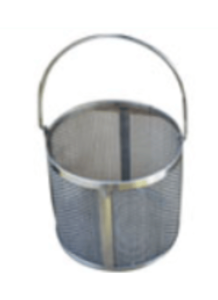
20 cm Dia x 20 cm height, fitted with galvanised wire mesh 6.3mm size with handle.

Density Basket - SKG Group

As Per IS 2386 (PART III) - 1963.

For determining the elongation index of coarse aggregates. It is constructed on steel mounted on a hardwood base

As Per IS 2386 (PART I) - 1963.

For determining the Flakiness index of coarse aggregates.
It is constructed of heavy gauge steel sheet with chromium plating having slots with marked sizes of 63 50, 5040, 4031.5, 31.525, 2520, 2016, 16- 12.5, 12.5 10 and 106.3.

As Per IS 2386 (PART I) - 1963.

As Per IS 10070 - 1982 & IS 2386 (PART IV) - 1963.

Used to determine the resistance to wear of small size of coarse aggregates and crushed rock.

The machine consist of a hollow cylinder of Steel, closed at both ends, having an inside Diameter of 700mm and inside length of 500mm. The opening shall be closed dust tight with a removable bolted in place. A detachable shelf, which extends through the drum catches the abrasive charge and does not allow it to fall on the cover. The drum is rotated at a speed of 30 to 33 rpm by an electric motor through a heavy-duty reduction gear. It is fitted with counter and push button starter. A tray for collection of the material and set of 12 Nos. hardened steel balls will be supplied with the machine.

  • To determine the unit weight of Aggregate.
  • Made from sheet iron, complete with handle.

As Per IS 1199-1959.

Metal Measure of Capacity 05 Ltr.

  • To determine the unit weight of Aggregate.
  • Made from sheet iron, complete with handle.

As Per IS 1199-1959.

  • To determine the unit weight of Aggregate.
  • Made from sheet iron, complete with handle.

As Per IS 1199-1959.

Metal Measure of Capacity 15 Ltr.

  • To determine the unit weight of Aggregate.
  • Made from sheet iron, complete with handle.

As Per IS 1199-1959.

  • To determine the unit weight of Aggregate.
  • Made from sheet iron, complete with handle.

As Per IS 1199-1959.

Metal Measure of Capacity 30 Ltr.

  • To determine the unit weight of Aggregate.
  • Made from sheet iron, complete with handle.

As Per IS 1199-1959.

It is used to determine specific gravity of clays, sand and gravel of size smaller than 10 mm.
Complete with Brass Cone, Locking Ring with Rubber Seal. Capacity about 1 kg.

As per IS 2386 (Part III) 1963.

As Per IS 1607 1960

Consist of a metal box fitted with a series of chutes of equal width, which discharges the material alternatively in opposite directions into separate pans. The chutes of the riffle are steep enough to allow rapid following of the material.

RIFFLE SAMPLE DIVIDER with 16 Nos. Slots of 20 mm width.

As Per IS 16071960.

Consist of a metal box fitted with a series of chutes of equal width, which discharges the material alternatively in opposite directions into separate pans. The chutes of the riffle are steep enough to allow rapid following of the material.

RIFFLE SAMPLE DIVIDER with 16 Nos. Slots of 25 mm width.

As Per IS 16071960.

Consist of a metal box fitted with a series of chutes of equal width, which discharges the material alternatively in opposite directions into separate pans. The chutes of the riffle are steep enough to allow rapid following of the material.

RIFFLE SAMPLE DIVIDER with 12 Nos. Slots of 40 mm width.

As Per IS 16071960.

Consist of a metal box fitted with a series of chutes of equal width, which discharges the material alternatively in opposite directions into separate pans. The chutes of the riffle are steep enough to allow rapid following of the material.

RIFFLE SAMPLE DIVIDER with 08 Nos. Slots of 50 mm width.

As Per IS 16071960.

Consist of a metal box fitted with a series of chutes of equal width, which discharges the material alternatively in opposite directions into separate pans. The chutes of the riffle are steep enough to allow rapid following of the material.

GENERAL LAB EQUIPMENTS

GENERAL LAB EQUIPMENTS

Sieve Shaker. Gyratory Motion - Motorised. 20cm Dia Adaptor

Carries up to 7 sieves of 150 mm or 200 mm Diameter. The shaker is driven by 1/2 HP motor through a reduction gear immersed in oil. The sieve table does not rotate but is inclined from the vertical axis and the direction of inclination changes progressively in clockwise direction. If the stop pin below the table is removed, the shaker can have rotary motion. In addition to this gyratory motion of the table, there is an upward and downward movement ensuring that each square cm of the sieve is utilised. A pair of rods and a holder is supplied.

The holder can be fixed on the top of the upper most sieve and thus the sieve set is firmly held. Suitable for operation from 230 Volts, 50 Cycles, Single Phase, AC Supply. Complete with 0-60 minutes Mechanical Timer.

Porta tellus aliquam ligula sollicitudin

Lorem ipsum dolor sit amet, consectetur adipiscing elit, sed do eiusmod tempor incididunt ut labore et dolore magna aliqua. Ut enim ad minim veniam, quis nostrud exercitation ullamco laboris nisi ut aliquip ex ea commodo consequat.
” Lorem ipsum dolor sit amet, consectetur adipiscing elit, sed do eiusmod tempor incididunt ut labore et dolore magna aliqua. Ut enim ad minim veniam, quis nostrud exercitation ullamco laboris nisi ut aliquip ex ea commodo consequat. “

Tincidunt wisi euismod iaculis nunc vita

Nostra dapibus varius et semper semper rutrum ad risus felis eros. Cursus libero viverra tempus netus diam vestibulum lorem tincidunt congue porta. Non ligula egestas commodo massa. Lorem non sit vivamus convallis elit mollis. Viverra sodales feugiat natoque sem morbi hac nunc ultricies nibh netus facilisis blandit. Felis purus et iaculis. Semper orci duis montes curabitur potenti a varius quis diam, vel litora et? Quis ridiculus pharetra luctus augue duis.

Parturient tortor tortor sed tellus molestie neque

Griffin, low form, with spout, Graduated, Complete with Calibration Certificate traceable to National Standards. Having 20 mm Outer Dia & 25 mm Height.

Graduated, Single Metric Scale, With Pour Out, With Hexagonal Base, Class A, With Works Certificate. Having Capacity 5 ml; Least Count of 0.1 ml; Tolerance 0.05 ml & Height 110 mm.

Having Capacity 10 ml; Least Count of 0.2 ml; Tolerance 0.1 ml & Height 140 mm.
Having Capacity 25 ml; Least Count of 0.5 ml; Tolerance 0.25 ml & Height 170 mm.
Having Capacity 50 ml; Least Count of 1.0 ml; Tolerance 0.5 ml & Height 200 mm.
Having Capacity 100 ml; Least Count of 1.0 ml; Tolerance 0.5 ml & Height 260 mm.
Having Capacity 250 ml; Least Count of 2.0 ml; Tolerance 1.0 ml & Height 335 mm.
Having Capacity 500 ml; Least Count of 5.0 ml; Tolerance 2.5 ml & Height 390 mm.
Having Capacity 1000 ml; Least Count of 10.0 ml; Tolerance 5.0 ml & Height 470 mm.
Having Capacity 2000 ml; Least Count of 20.0 ml; Tolerance 10.0 ml & Height 570 mm.

Graduated, Single Metric Scale, With Pour Out, With Hexagonal Base, Accuracy as per IS 878: 1975. Complete with Calibration Certificate. Having Capacity 5 ml; Least Count of 0.1 ml; Tolerance 0.1 ml & Height 110 mm.

Having Capacity 10 ml; Least Count of 0.2 ml; Tolerance 0.2 ml & Height 140 mm.
Having Capacity 25 ml; Least Count of 0.5 ml; Tolerance 0.5 ml & Height 170 mm.
Having Capacity 50 ml; Least Count of 1.0 ml; Tolerance 1.0 ml & Height 200 mm.
Having Capacity 100 ml; Least Count of 1.0 ml; Tolerance 1.0 ml & Height 260 mm.
Having Capacity 250 ml; Least Count of 2.0 ml; Tolerance 2.0 ml & Height 335 mm.
Having Capacity 500 ml; Least Count of 5.0 ml; Tolerance 5.0 ml & Height 390 mm.
Having Capacity 1000 ml; Least Count of 10.0 ml; Tolerance 10.0 ml & Height 470 mm.
Having Capacity 2000 ml; Least Count of 20.0 ml; Tolerance 20.0 ml & Height 570 mm

Erlenmeyer, graduated, conical, narrow mouth. Having Capacity 10 ml; Approx. O.D. 34 mm; Approx. Height 60 mm; Approx. Neck O.D. 15 mm.

Having Capacity 25 ml; Approx. O.D. 42 mm; Approx. Height 70 mm; Approx. Neck O.D. 21 mm.
Having Capacity 50 ml; Approx. O.D. 51 mm; Approx. Height 82 mm; Approx. Neck O.D. 21 mm.
Having Capacity 100 ml; Approx. O.D. 64 mm; Approx. Height 105 mm; Approx. Neck O.D. 25 mm.
Having Capacity 150 ml; Approx. O.D. 72 mm; Approx. Height 124 mm; Approx. Neck O.D. 28 mm.
Having Capacity 250 ml; Approx. O.D. 85 mm; Approx. Height 140 mm; Approx. Neck O.D. 34 mm.
Having Capacity 500 ml; Approx. O.D. 104 mm; Approx. Height 176 mm; Approx. Neck O.D. 34 mm.
Having Capacity 1000 ml; Approx. O.D. 131 mm; Approx. Height 220 mm; Approx. Neck O.D. 42 mm.
Having Capacity 2000 ml; Approx. O.D. 165 mm; Approx. Height 286 mm; Approx. Neck O.D. 48 mm.
Having Capacity 3000 ml; Approx. O.D. 185 mm; Approx. Height 315 mm; Approx. Neck O.D. 48 mm.
Having Capacity 5000 ml; Approx. O.D. 220 mm; Approx. Height 377 mm; Approx. Neck O.D. 50 mm.

Useful in excavating Hole from the soil surface.
Length: 250 mm (Approx). One end taper forged duly hardened and another end as handle.

Consists of a steel blade, of a special shape. A wooden handle is fixed to the stem of the blade

Light weight portable, die cast Aluminum components keep overall weight minimal. Exclusive oil less construction of diaphragm NEVER REQUIRES LUBRICATION, permanently lubricated ball bearings, low noise level, balanced eccentrics provided smooth low vibration free operation, built in micro air filter.

Continuously rated with built in rugged motor, PRACTICALLY MAINTENANCE FREE. Free Air Displacement: 45 Ltr. / Minute; Maximum vacuum: 22 Hg; Maximum Pressure: 40 PSI. Motor: 1/8 HP

Made of stainless steel, fitted with immersion type element with iron brackets to be fixed on the wall on which the still can rest, electrically operated on 220/230 volts AC with condenser opening facility for ease of periodical cleaning. The stated output of the still is approximate as it is bound to vary according to the voltage of mains.

Construction. Double walled. Inside made of Stainless Steel, Outer made of CRC / S.S. Powder Coated. Glass Wool insulation.

Temperature Range.: From 5° C above ambient to 100° C.
Temp. Controlled By.: Dual Display Micro Processor Based Digital Temperature Indicator cum Controller. Control Accuracy ± 0.5° C.

Standard Supply. Complete with a Stirrer mounted on a base and fitted on the side of the bath at the top. Three Core Wire with Plug.
Operated On.: 230 V, 50 Hz, Single Phase, AC Supply.

Construction. Double walled. Inside made of Stainless Steel, Outer made of CRC / S.S. Powder Coated. Gap between the wall filled with Glass Wool.
Temperature Range.: 5° C above ambient to 100° C.
Controlled By.: Sensitive Thermostat.
Standard Supply. Complete with stainless steel lid. Three Core Wire with Plug. (Without Thermometer).
Operated On.: 230 V, 50 Hz, Single Phase, AC Supply.

Construction. Double walled. Inside made of Stainless Steel, Outer made of CRC / S.S. Powder Coated. Gap between the wall filled with Glass Wool.
Temperature Range: 5° C above ambient to 100° C.
Controlled By.: Sensitive Thermostat.
Standard Supply: Complete with stainless steel lid. Three Core Wire with Plug. (Without Thermometer).
Operated On: 230 V, 50 Hz, Single Phase, AC Supply.

Construction. Made Of Stainless Steel. Glass wool Insulation.
Heating Elements.: Nichrome Heating Elements rating 350W are within a conically shaped refractory crucible, which is enclosed in a S.S. casing with proper Insulation.
Temperature Range.: Up to 800° C to 900° C. Temp.
Controlled By.: Energy Regulator.
Standard Supply. Three core wire and three Pin Plug
Operated On.: 230 V, 50 Hz, Single Phase, AC Supply

Construction. Rectangular Top Plate made of Cast Iron / S.S. and body made of thick PCRC / S.S. duly POWDER COATED.
Controlled By.: Energy Regulator

Construction. Construction. Rectangular Top Plate made of Cast Iron / S.S. and body made of thick PCRC / S.S. duly POWDER COATED.
Controlled By.: Sensitive Thermostat

Construction. Round Top Plate made of Cast Iron S.S. and body made of thick PCRC S.S. duly POWDER COATED. Temp.
Controlled By.: Energy Regulator.

Construction. Round Top Plate made of Cast Iron / S.S. and body made of thick PCRC / S.S. duly POWDER COATED. Temp.
Controlled By.: Sensitive Thermostat

Construction. Double walled. Inside Chamber made of Stainless Steel, Outer Body made of CRC / G.I. Powder Coated. Inner water tank made of stainless steel with ball cock valve. Front doorhas a full view glass observation window.

Temperature Range.: 10° C to 60° C.

Temp. Controlled By.: By Dual Display Microprocessor Based Digital Temperature Controller.

Control Accuracy.: ± 0.5° С.

Cooling System. Consist of high efficiency Kirlosker / Equivalent Make Compressor with relevant accessories. Humidity Range. From atmospheric humidity to 95%.

Humidity Controlled.: Microprocessor Based Digital Direct RH cum Temperature Controller. Control Accuracy.: ± 3% RH.

Operated On.: 230 V, 50 Hz, Single Phase, AC Supply.

Double walled with double insulation for minimum heat leakage and faster Temperature rise. The outer casing made of thick CRC Powder Coated, heating chambers consists of rectangular horizontal totally enclosed muffle bracket.

Heating Elements are made of Kanthal A1 wire.

Maximum Temperature is 1200Deg. C.

Working Temperature is 1130Deg C.

Temperature is Controlled By Dual Display Microprocessor Based Digital Temperature Indicator cum controller. Supplied complete with Three core wire and three Pin Plug.

These Furnaces are operated On 230 V, 50 Hz, Single Phase, AC Supply

Construction. Double Walled. 75 mm thick glass wool insulation. Outer Chamber made of Mild Steel duly finished. Inner Chamber made of Aluminium / S.S.

Temperature Range.: 50° C to 250° C.

Temp. Controlled By.: Dual Display Micro Processor Based Digital Temperature Controller cum Indicator.

Control Accuracy ± 1° or better

Heating Elements. Made of 80/20 Nichrome Wires. Heaters are placed in the both of the sides of the Oven.

Standard Supply. Perforated trays made of Aluminium /S.S. Three Core Wire with Plug.

Operated On.: 230 V, 50 Hz, Single Phase, AC Supply.

Construction. Double Walled. 75 mm thick glass wool insulation. Outer Chamber made of Mild Steel duly finished. Inner Chamber made of Aluminium / S.S.

Temperature Range. C. 50° C to 250 Temp.

Controlled By.: Sensitive Thermostat.

Heating Elements. Made of 80/20 Nichrome Wires. Heaters are placed in the both of the sides of the Oven.

Standard Supply. Perforated trays made of Aluminium /S.S. Built-in 'L' shaped Thermometer. Three Core Wire with Plug.

Operated On.: 230 V, 50 Hz, Single Phase, AC Supply.

Construction. Double Walled. 75 mm thick glass wool insulation. Outer Chamber made of Mild Steel /S.S. duly finished. Inner Chamber made of S.S.

Temperature Range.: 50° C to 400° C. Temp.

Controlled By.: Dual Display Micro Processor Based Digital Temperature Controller cum Indicator. Control Accuracy ± 1° or better

Heating Elements. Made of 80/20 Nichrome Wires. Heaters are placed in the both of the sides of the Oven.

Standard Supply. Perforated trays made of S.S. Rod. Three Core Wire with Plug.

Operated On.: 230 V, 50 Hz, Single Phase, AC Supply

Can carry up to 6 sieves & 1 Lid Pan Set of 200 mm, 300 mm or 450 mm Diameter. The shaker is driven by 1/2 HP motor through a reduction gear immersed in oil. The sieve table does not rotate but is inclined from the vertical axis and the direction of inclination changes progressively in clockwise direction. If the stop pin below the table is removed, the shaker can have rotary motion. In addition to this gyratory motion of the table, there is an upward and downward movement ensuring that each square cm of the sieve is utilised. A pair of rods and a holder is supplied.

The holder can be fixed on the top of the upper most sieves and thus the sieve set is firmly held. Suitable for operation on 230 Volts, 50 Cycles, Single Phase, AC Supply. Complete with 0 60 minutes Mechanical Timer.

Construction. Double walled. Inside Chamber made of Stainless Steel, Outer Body made of CRC / G.I. Powder Coated.

Inner water tank made of stainless steel with ball cock valve. Front doorhas a full view glass observation window. Temperature Range. 10° C to 60° C.

Temp. Controlled By. By Dual Display Microprocessor Based Digital Temperature Controller. Control Accuracy. : ±

0.5°C.

Cooling System. Consist of high efficiency Kirlosker / Equivalent Make Compressor with relevant accessories. Humidity Range. From atmospheric humidity to 95%.

Humidity Controlled.: Microprocessor Based Digital Direct RH cum Temperature Controller.

Control Accuracy.: ± 3% RH.

Operated On.: 230 V, 50 Hz, Single Phase, AC Supply.

Inner Chamber is made of Stainless Steel and having size of 45 H x 45 W x 45 D cm & Volume 3 Cubic Feet. Complete with 3 Trays, made of Stainless Steel

As per IS 460 - 1962.

Made of Brass Frame, without joint. With following apertures.

Made of Brass Frame, without joint. With following aperture.

As per IS 460 - 1962.
Made of G. I. Frame of 45 cm Dia with perforated steel plate having square punch of various apertures.

As per IS 460 - 1962.
Made of G. I. Frame of 30 cm Dia with perforated steel plate having square punch of various apertures.

Complete with cover and top knob

These vacuum type desiccators, when ground surface is cleaned and greased, will hold a vacuum of 500 mm of Hg over a 24 hours period. Complete with cover and sleeve

Flat Bottom, with Pour Out.

Heavy Wall, Bolt Neck.

FLASKS GLASS. FILTERING, WITH TUBULATION. 250 ml.
Having Capacity 250 ml; Approx. O.D. 85 mm; Approx. Height 165 mm.

FLASKS - GLASS. FILTERING, WITH TUBULATION. 500 ml.
Having Capacity 500 ml; Approx. O.D. 105 mm; Approx. Height 184 mm.

FLASKS GLASS. FILTERING, WITH TUBULATION. 1000 ml.
Having Capacity 1000 ml; Approx. O.D. 136 mm; Approx. Height 250 mm.

FLASKS - GLASS. FILTERING, WITH TUBULATION. 2000 ml.
Having Capacity 2000 ml; Approx. O.D. 168 mm; Approx. Height 295 mm.

FLASKS - GLASS. FILTERING, WITH TUBULATION. 5000 ml.
Having Capacity 5000 ml; Approx. O.D. 237 mm; Approx. Height 450 mm.

Funnels, Plain, 60°C. Angle, Long Stem.

Useful for Stirring the sample. GLASS ROD. 20 cm Long x 6 mm Dia.

Measuring (Mohr Type), Accuracy As per Class B of IS 4162: 1967. These pipettes are graduated for delivery from zero mark to the last graduation mark.

Measuring (Mohr Type), Accuracy As per Class A of IS 4162: 1967, with works certificate. These pipettes are graduated for delivery from zero mark to the last graduation mark.

Made from Borosilicate Glass.

MOISTURE METER

MOISTURE METER

Moisture Meter For Wood & Concrete.

Designed to Check the moisture level of wood, concrete, gypsum and other non- wood material.

Used the 2 pins electrode to measure the conductive ability of the spices, then converter to the of % “moisture Content”.
6% to 40% Measures moisture content on wood.
0% to 100% on relative moisture value for Concrete and other non-wood material.
0.2% to 50% moisture Range on Gypsum.
Complete with Instruction Manuals, Moisture Probe and Carrying Case

Porta tellus aliquam ligula sollicitudin

Lorem ipsum dolor sit amet, consectetur adipiscing elit, sed do eiusmod tempor incididunt ut labore et dolore magna aliqua. Ut enim ad minim veniam, quis nostrud exercitation ullamco laboris nisi ut aliquip ex ea commodo consequat.
” Lorem ipsum dolor sit amet, consectetur adipiscing elit, sed do eiusmod tempor incididunt ut labore et dolore magna aliqua. Ut enim ad minim veniam, quis nostrud exercitation ullamco laboris nisi ut aliquip ex ea commodo consequat. “

Tincidunt wisi euismod iaculis nunc vita

Nostra dapibus varius et semper semper rutrum ad risus felis eros. Cursus libero viverra tempus netus diam vestibulum lorem tincidunt congue porta. Non ligula egestas commodo massa. Lorem non sit vivamus convallis elit mollis. Viverra sodales feugiat natoque sem morbi hac nunc ultricies nibh netus facilisis blandit. Felis purus et iaculis. Semper orci duis montes curabitur potenti a varius quis diam, vel litora et? Quis ridiculus pharetra luctus augue duis.

Parturient tortor tortor sed tellus molestie neque

This Rain Gauge is manufactured from fiberglass reinforced plastic (F.R.P.), which is non corrosive Container is assembled with Gun-metal Ring and Locking arrangements. Siphoning System and Recording arrangements are manufactured from Brass. Complete with iron stand, recording ink, bottle 25ml, 100 sheet graph in book shape and its clock.

As per IS 5235: 1969.

Rain Gauge is manufactured from non corrosive fiber glass reinforced plastic (F.R.P.) container. It consists of collector assembled with Gun-metal Ring. Funnel, Locking Rings and Base. The Rain Gauge is supplied with 4 liter bottle and glass measuring cylinder. Complete with PVC Measuring Cylinder of 10 mm.

As per IS 5225: 1992.

Frequency & time weighting meet IEC 61672 type 2.
Range 35 to 130 dB; 3 ranges; Data Hold.

A frequency weighting, Fast Time Weighting.
Frequency & time weighting meet IEC 61672 type 2.

Range 30 to 130 dB.
A, C weighting; Max & Data Hold; AC/DC Output.

SOIL TESTING INSTRUMENTS

As Per IS 2386 (PART I) – 1963.

As Per IS: 2720 (PART-VII & VIII).

SOIL TESTING INSTRUMENTS

Automatic Compaction Machine.

A mechanically cum electrically operated device is useful to eliminate the hand compaction procedure, which also considerably saves time with the rammers provided for both of the standard and heavy compaction of the soil. Useful for soil compaction into 100 mm or 150 mm Dia moulds.

Two sets of rammers are provided, one of 2.6 kg weight and arranged for 310 mm fall and the other one is of 4.89 kg and arranged for 450 mm fall. For compaction in 150 mm Dia moulds, there are 100 mm Dia rammers of 2.6 kg & 4.89 kg are provided and for compaction in 100 mm Dia moulds, there are 50 mm Dia rammers are provided. The rammer assembly is provided with ratchet and pawl arrangement to lift it from the top of the soil layer

When the rammer reaches the required height, the pawl releases the rammer, which falls freely on the soil surface. An arm moving up and down operates the release mechanism, which is connected to a reduction gear coupled to the motor through another arm. An automatic blow counter is fitted to the compactor is used to set number of blows. The base plate of the specimen mould can be fitted to the rotating base plate of the instrument, which makes 1/5th revolution per stroke.

The equipment is suitable for operation on 230 Volts, 50 cycles, single phase and A.C. supply without moulds.


Porta tellus aliquam ligula sollicitudin

Lorem ipsum dolor sit amet, consectetur adipiscing elit, sed do eiusmod tempor incididunt ut labore et dolore magna aliqua. Ut enim ad minim veniam, quis nostrud exercitation ullamco laboris nisi ut aliquip ex ea commodo consequat.
” Lorem ipsum dolor sit amet, consectetur adipiscing elit, sed do eiusmod tempor incididunt ut labore et dolore magna aliqua. Ut enim ad minim veniam, quis nostrud exercitation ullamco laboris nisi ut aliquip ex ea commodo consequat. “

As Per IS 2386 (PART I) - 1963.

As Per IS 9669-1980 & IS 2720 (Part XVI) - 1979.
Weight: 2.5 Kg; Dia: 147 mm; Central Hole: 53 mm.
Weight: 5 Kg; Dia: 147 mm; Central Hole: 53 mm.

As Per IS 2386 (PART I) - 1963.
As Per IS 2720 (Part XVI) 1979.
Complete duly chromium plated.

As Per IS 9669-1980 & IS 2720 (Part XVI) - 1979.
148 mm Dia x 47.7 mm high with detachable handle.

As Per IS 9669-1980 & IS 2720 (Part XVI) - 1979.

For holding Dial Gauge during expansion test.

Made of Mild Steel. Dia 150 mm; High: 175 mm: Complete with extension collar of 50 mm high and perforated base plate.

Made of Gun Metal. Dia 150 mm; High: 175 mm: Complete with extension collar of 50 mm high and perforated base plate.

As Per IS 9669-1980 & IS 2720 (Part XVI) - 1979.

As Per IS 9669-1980 & IS 2720 (Part XVI) - 1979.

Face Dia: 50 mm; Complete with adjustable bracket.

As Per IS 9669-1980 & IS 2720 (Part XVI) - 1979.

Weight: 2.5 Kg; Dia: 147 mm; Central Slot: 53 mm.

It is useful in determining the load carrying capacity in the field, when in-place density and water contents are such that the degree of saturation is 80% or greater, when material is cohensionless and coarse grained, such that it is not effected by changes in water contents and when the material has been in-place for considerable time

The loading is effected by means of a mechanical load frames, which can be fixed to the under side of a truck.
The set includes:

MECHANICAL SCREW JACK. 100 ΚΝ.
Capacity: 100 KN; Complete with U-brackets and Swivel Head.

C.B.R. PENETRATION PISTON.
Face Dia: 50 mm; Complete with adjustable bracket.

EXTENSION RODS SET.
Set consists of 2 lengths of 5 cm, 2 lengths of 10 cm, 1 length of 30 cm, 1 length of 50 cm and 1 length of 100 cm. Used as spacers between the proving ring and penetration piston. The lengths are machined from tubing.

CONNECTOR SET.
Has eight connectors for coupling the penetration piston and proving ring assembly either directly or thru' extension pieces.

DIAL GAUGE SUPPORT.
Made of seamless pipe construction. It stands 30 cm high and 45 cm wide at the base. Provided with a quick release screw type clamp capable of sliding and locking anywhere along 1 meter length of the bridge.

ANNULAR METAL WEIGHT. 5 kg x 250 mm Dia.
Weight: 5 Kg; Dia: 250 mm; Central Hole: 53 mm.

SLOTTED METAL WEIGHT. 5 Kg x 250 mm Dia.
Weight: 5 Kg; Dia: 250 mm; Central Slot: 53 mm.

SLOTTED METAL WEIGHT. 10 Kg.
Weight: 10 kg; Dia: 215 mm to 250 mm; Central Slot: 53 mm Dia slot.

As Per IS 2720 (Part - XXXI) - 1969.

For finding the relative bearing ratio and expansion characteristics of soils of sub base and sub grade for the design of roads, pavements and runways.
The set includes:

C.B.R. MOULD. MILD STEEL.
Dia: 150 mm; High: 175 mm. Complete with extension collar of 50mm high and perforated base plate

RAMMERS - SOIL COMPACTION. 2.60 Kg.

Weight: 2.6 Kg; Controlled Drop: 310 mm.

RAMMERS - SOIL COMPACTION. 4.89 Kg.
Weight: 4.89 Kg; Controlled Drop: 410 mm.

PERFORATED BRASS SWELL PLATE.

Dia: 148 mm; Complete with adjustable stem and lock nut gunmetal.

C.B.R. ANNULAR METAL WEIGHT. 2.5 kg,
Weight: 2.5 Kg; Dia: 147 mm; Central Hole: 53 mm.

C.B.R. SLOTTED METAL WEIGHT. 2.5 kg,
Weight: 2.5 Kg; Dia: 147 mm; Slot: 53 mm.

C.B.R. CUTTING COLLAR
Complete with chromium plating.

C.B.R. TEST APPARATUS. LABORATORY TYPE. ELECTRICAL.SIGNLE SPEED.
Complete with
LFM-50KN01. LOAD FRAME - MOTORISED. SINGLE SPEED.
Motorised Cum Hand operated with Single speed of 1.25 mm / min. rate of strain. Can be operated on 230 Volts, 50 Hz, Single Phase, AC Supply.

C.B.R. TEST APPARATUS. LABORATORY TYPE. ELECTRICAL. THREE SPEED.
Complete with

LFM-50KN03. LOAD FRAME MOTORISED. THREE SPEED.
Motorised Cum Hand operated with Three speed of 1.25, 1.5 & 2.5 mm / min. rate of strain. Can be operated on 230 Volts, 50 Hz, Single Phase, AC Supply.

C.B.R. TEST APPARATUS. LABORATORY TYPE. HAND OPERATED.
Complete with

LFH-50KN. LOAD FRAME - HAND OPERATED. 50 ΚΝ.
Hand operated with low rates of travel of the lead screw.

As Per IS 2720 (Part XVI) - 1979 & IS 9669 - 1980

For determining liquid limit of soils. This is specially useful to obtain reliable and accurate results for those soils, which have low plasticity index.

The percentage moisture contain determined when cone with half angle of 15 - 30 minutes under a total sliding weight of 148 gm penetrates 25 mm gives liquid limit. Complete with container.

As Per IS 2720 (Part V) - 1965.

Consolidation test is unidimentional test considered extremely important in soil mechanics. Sample taken from adjacent areas of a single site show differential settlement even when tested using same techniques. Soil of similar strength may show varying consolidation. Samples are very carefully prepared and vertical settlement of the specimen in saturated or carefully recorded when known load is applied.

CONSOLIDATION LOADING UNIT.
Having maximum capacity of 20 kg/cm2. A loading yoke connected to a lever arm with a counter balancing adjustment and having a lever ratio of 1:10, the whole assembly being mounted on a sturdy steel frame stand.

CONSOLIDOMETER (ODEOMETER) CELL ASSEMBLY. FIXED RING TYPE.

For testing 60 mm Dia x 20 mm thick specimen comprising:
>Fixed Ring for specimens 60 mm Dia x 20 mm thick guide ring.
> Top and Bottom porous stones for 60 mm Dia specimen.
>Perforated pressure pad.
> Channeled base with water inlet and gasket.
> Flanged water jacket, water reservoir with plastic tube and pinch cock.
> Set of weights comprising 7 Nos. of 0.05 Kg/cm2, 5 Nos. of 0.1 Kg/cm2, 6 Nos. of 0.2 Kg/cm2,6 Nos. of 0.5 Kg/cm2 & 5 Nos. of 1.0 Kg/cm2 to give pressure of 10 kg/cm2 on 60 mm Dia specimen.

CONSOLIDATION APPARATUS. THREE CELL.
As Per IS 2720 Consists of 3 consolidation test assemblies mounted on a single frame. Complete with 3 sets of Consolidometer cell assembly for 60 mm Dia specimen and three set of weights each giving 10 kg/cm2 on each sample.

CONSOLIDATION APPARATUS. SIX CELL.
Consists of 6 consolidation test assemblies mounted on a single frame. Complete with 6 sets of Consolidometer cell assembly for 60 mm Dia specimen and Six set of weights each giving 10 kg / cm2 on each sample.

As Per IS 2720 (Part - XV) - 1965 & IS 12287 - 1988.

This device is used to maintain cell pressure constant for a long duration and the system can be used in place of conventional constant pressure system using mercury post where certain minimum heights are required. Problems like deairation of pump, leakage of mercury etc. are eliminated in this system. This unit is smaller in volume and can be used in mobile laboratory also.

This can maintain pressure in the cell upto 20 kg/cm². Pressure is maintained constant in the system by a balancing calibrated weighs on a spindle against a column of oil, operating under constant feed back.

CONSTANT PRESSURE SYSTEM - OIL WATER. 20 Kg / cm2.
The system consists of an oil pump continuously driven by an electric motor during the test period. The internal components are housed in a strong compact housing. The piston on which weights are kept rotates with minimum friction. A transparent oil water vessel is provided to transmit pressure to the cell. A hand pump provided to facilitate priming and to maintain constant pressure during power failure.

Range: 0-20 bar (0-20 kg/cm2).
Steps of Pressure: 0.5 bar (0.5 kg/cm2)
Accuracy: 0.5%.
Power Required: 230 Volt, Single Phase, 50 Hz, A.C. supply.

Supplied complete with Pressure Gauge, flow valves, connecting Pressure hose and set of weights to give maximum pressure of 20 bar (20 kg/cm2).

Consolidation test is unidimentional test considered extremely important in soil mechanics. Sample taken from adjacent areas of a single site show differential settlement even when tested using same techniques. Soil of similar strength may show varying consolidation. Samples are very carefully prepared and vertical settlement of the specimen in saturated or carefully recorded when known load is applied.

CONSOLIDATION LOADING UNIT.

Having maximum capacity of 20 kg/cm2. A loading yoke connected to a lever arm with a counter balancing adjustment and having a lever ratio of 1:10, the whole assembly being mounted on a sturdy steel frame stand.

CONSOLIDOMETER (ODEOMETER) CELL ASSEMBLY. FIXED RING TYPE.
For testing 60 mm Dia x 20 mm thick specimen comprising :

>Fixed Ring for specimens 60 mm Dia x 20 mm thick guide ring.
> Top and Bottom porous stones for 60 mm Dia specimen.
>Perforated pressure pad.
> Channeled base with water inlet and gasket.
> Flanged water jacket, water reservoir with plastic tube and pinch cock.
> Set of weights comprising 7 Nos. of 0.05 Kg/cm2, 5 Nos. of 0.1 Kg/cm2, 6 Nos. of 0.2 Kg/cm2,6 Nos. of 0.5 Kg/cm2 & 5 Nos. of 1.0 Kg/cm2 to give pressure of 10 kg/cm2 on 60 mm Dia specimen.

CONSOLIDATION APPARATUS. THREE CELL.
Consists of 3 consolidation test assemblies mounted on a single frame. Complete with 3 sets of Consolidometer cell assembly for 60 mm Dia specimen and three set of weights each giving 10 kg/cm2 on each sample.

CONSOLIDATION APPARATUS. SIX CELL.

Consists of 6 consolidation test assemblies mounted on a single frame. Complete with 6 sets of Consolidometer cell assembly for 60 mm Dia specimen and Six set of weights each giving 10 kg/cm2 on each sample.


Make: BAKER

For determining the direct shear strength of soils on specimen size 60 x 60 x 25 mm. The apparatus consists as below:

SPECIMEN CUTTER.

For cutting 60 x 60 x 25 mm specimen from the larger samples. Comprising 4 Nos. of 0.05 Kg/cm2, 1 Nos. of 0.1 Kg/cm2, 1 Nos. of 0.2 Kg/cm2, 3 Nos. of 0.5 Kg/cm2 & 1 Nos. of 1.0 Kg/cm2 to give a normal stress of 3 Kg/cm2 through lever.

DIRECT SHEAR APPARTUS - ELECTRIC. SINGLE SPEED.
Constant rate of strain of 1.25 mm/min. Suitable for 230 V. Ac supply.

DIRECT SHEAR APPARTUS - ELECTRIC. TWELVE SPEEDS.
Twelve rate of strain of 1.25, 0.625, 0.25, 0.125, 0.05, 0.025, 0.01, 0.005, 0.002, 0.001, 0.0004 and 0.0002 mm / min. Suitable for 230 V. Ac supply.

PROVING RING COMPRESSION TYPE. 10 ΚΝ.
Having Capacity of 10 KN / 1000 Kg. / 1.00 Tone Supplied complete with our own calibration certificate.

DIAL GAUGE - CHINESE. 30 mm Travel x 0.01 mm Division.
Range: 0-30 mm; Least Count: 0.01 mm.

SHEAR BOX HOUSING.
Accommodates the shear box assembly. Complete with two ball roller strips.

SHEAR BOX ASSEMBLY.
Comprising direct shear box in two halves for a square specimen size of 60 x 60 x25 mm one pair of plain gripper plates, one pair of perforated gripper place, one pair of porous stones, One top loading pad.

LOADING UNIT.
Supplied with load yoke with direct and lever system for applying load. Normal stress capacity 8 Kg/cm². Load is applied either directly or through a counter balanced detachable lever. Provision is made for the load to be applied either through a steel ball recessed in the loading pad or direct through a boss on the pre calibrated loading yoke.

The loading unit is provided with a V strips for frictionless movement of shear box housing.

Used for determination of in-situ dry density of natural or compacted fine-grained soil, free from aggregates. A cylindrical cutter is used to extract the sample of the soil with the help of dolly and rammer. From the weight, density and the moisture and dry density of the soil is readily calculated.

CORE CUTTER APPARATUS. 175 mm.

Apparatus comprises as below:
CC-175. CORE CUTTER. 175 mm. Dia: 100 mm; Height: 175 mm.

DOLLY.
Dia: 100 mm; Height: 25 mm; Complete with a lip to enable it to be located on the top of the core cutter.

RAMMER - 9 Kg.
Weight: 9 Kg (Approx); Complete with a steel rod.

CORE CUTTER APPARATUS. 130 mm.

Apparatus comprises as below:
CC-130. CORE CUTTER. 130 mm. Dia: 100 mm; Height: 130 mm.

DOLLY.
Dia: 100 mm; Height: 25 mm; Complete with a lip to enable it to be located on the top of the core cutter.

RAMMER - 9 Kg.
Weight: 9 Kg (Approx); Complete with a steel rod

As Per IS 2720 (Part XXIX) - 1975.

Used to determine dry density of fine and medium grained soils and for layers not exceeding than 150 mm thickness.

Accessories:
METAL TRAY. 375 mm
Length: 375 mm; Width: 375 mm. Depth: 50 mm; Complete with 150 mm hole in the centre.

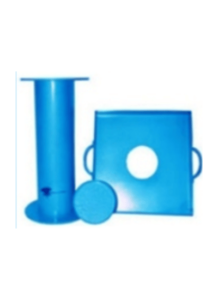
SAND REPLACEMENT TEST APPARATUS. 200 mm.
Used to determine dry density of fine, medium and coarse grained soils and for layers exceeding than 150 mm thickness but not exceeding than 250 mm thickness. Apparatus comprises as below: Complete with flange and shutter.

CALIBRATING CONTAINER. 250 mm.
Internal Dia: 250 mm.

CALIBRATING CONTAINER. 250 mm.
Internal Dia: 250 mm.

METAL TRAY. 450 mm.
Length: 450 mm; Width: 450 mm. Depth: 50 mm; Complete with 200 mm hole in the centre.

METAL TRAY. 450 mm.
Length: 450 mm; Width: 450 mm. Depth: 50 mm; Complete with 200 mm hole in the centre.

CALIBRATING CONTAINER. 100 mm.
Internal Dia: 100 mm.

METAL TRAY. 300 mm.
Length: 300 mm; Width: 300 mm. Depth: 50 mm; Complete with 100 mm hole in the centre.

SAND POURING CYLINDER. 150 mm Dia.
Complete with flange and shutter.

CALIBRATING CONTAINER. 200 mm.
Internal Dia: 200 mm.

As Per IS 2720 (Part - XXVIII).

As Per IS: 2720 (PART-IV) - 1985.

This is for the determination of the sub sieve particle distribution in a soil sample by mechanical analysis. An analysis of this kind expresses quantitatively the proportions by weight of various sizes of particles present in the soil. It is recommended as a standard procedure to use dispersion agent to avoid flocculation.

Consists of a sliding panel, which moves up and down by means of a screw allowing Anderson Pipette fixed to it to be raised or lowered vertically. A sedimentation tube is held by a laboratory clamp provided on the stand below the pipette. The depth of immersion is measured by a scale graduated in mm at the slide of the sliding panel. Supplied complete with Anderson glass pipette 10 ml, Sedimentation tube of 50 ml. and stand.

It is used for mechanical analysis and also for other laboratory applications for stirring.

A dispersion cup is supported on a rest on the stand of the stirrer and has a removable baffle. A regulator is also provided for regulating the speed. Operating on 220 volts, single phase, AC supply.

As Per IS 2720 (Part IV) - 1985.

It is designed for application of cell pressures up to 10 kg/cm² or 20 kg/cm² on a triaxial specimen in the triaxial cell. This unit is mostly used in routine tests, which last for about 10 to 15 minutes wherein the variation of cell pressure can be tolerated.

The apparatus consists of a pressure chamber which has a flanged top cap fitted with a 10 kg/cm2. Pressure gauge and a Schrader valve for pumping in air. Water inlet and drain cock are fitted to the chamber. The foot pump is also supplied which develops a pressure of 10 kg/cm² or 20 kg/cm². Complete with connecting pressure hose.

Liquid Limit is that water content at which a part of soil cut by a groove of standard dimension will flow together for a distance of 1.25 cm under air impact of 25 blows in standard liquid limit apparatus.

Consist of a brass cup hold on adjustable bracket. The bowl can be adjusted for a fall raised and dropped on a rubber of standard hardness by cam action. Complete with ASTM Casagrande grooving tools & Gauge block. Complete with counter.

Hand operated. A handle is provided for rotation of cam shaft to raise & drop the bowl.
Provided with motor, which is geared down to give approximately 120 RPM. Can be operated on 220 V, Single Phase, AC Supply.

As Per IS 2720 (Part - V) - 1985

The Truss is of welded 1-girder construction in two halves, which can be bolted together when required. The lower chord, the cross-pieces for holding the truss down and the vertical thrust members are all of welded box type construction with two channels enclosing and welded to an I - girder.

The anchorages are of a design tried out and perfected at CBRI, Roorkee. They consist of semi-cylindrical pieces each held down by 3 feet long steel long steel spikes driven in through holes drilled in the semi cylinder.

The spikes enter the ground at about 60 degree to the horizontal, from each side spaced along the length of the enchorage. The cross-pieces are moored to the anchorages by channel straps and bolts. Guy wires with turn-buckless are supplied to keep the truss erect.

Halogen heating, which is useful for removing moisture from entire area of the sample.

Memory for 99 users' selectable procedures for analysis.
Selection from four profiles for drying.
User friendly operations with selectable temperature and time for analysis.
Built-in RS232C interface for PC or Printer. It gives detailed print out of the analysis in compliance with GLP/GMP standards. (Optional CPR02) LED / Large graphical LCD display with A.E.P. (Advanced Eye Protection).
Improved repeatability.
Precision of Readout mass - 1mg.
Precision Readout of Moisture 0.01%.
Temperature Range for Drying - 160° C.Pan Size 100 mm.
Maximum Capacity 50 gm; Complete with Bakelite Graphic LCD Display.
Maximum Capacity 200 gm; Complete with LED Display.

As Per IS 2720 (Part II) - 1973.

This is very reliable and sturdy instrument for an accurate determination of moisture content of materials, which do not

undergo chemical change when exposed to Infra-Red radiations.

The instrument can be used for reliable determination of moisture content of agricultural soil, food, chemical, plastic, construction soil and other similar material.

Consists of a 250 watts Infra-Red lamp, a sensitive torsion balance for getting percentage of moisture on weight basis from a scale and the result obtained are convertible to moisture content on dry basis, a temperature regulator. The Infra Red Radiation from the lamp is used for heating the sample. The temperature is controlled by Solid Stat Electronic Regulator with an accuracy of 0.2% by direct reading and 0.1% by estimation. The instrument is directly calibrated in percentage of moisture between 0 to 100%. Complete with instruction manual.

The instrument can be supplied with Digital Timer alarm. This timer gives a continuous buzz after turning the Infra-Red lamp off after specified time.

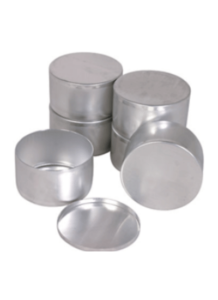
Complete with lid. Made From Aluminium.

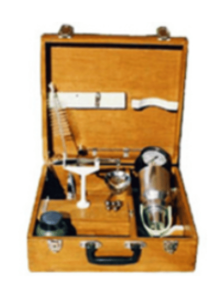
Used to determine the moisture contents of material ion powder form viz. soil, sand, coal, pottery slip, cement etc.

The unit consists of a pressure gauge with clamp for sealing cap, rubber sealing basket, pressure gauge calibrated in percentage moisture contents on the wet weight basis up to 25% / 50%, Which is equal to 33% moisture content on the dry weight basis. Complete with Calibration Certificate.

As Per IS 2720 (Part II) 1973.

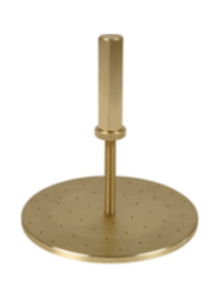
Dia: 148 mm; Complete with adjustable stem and lock nut made of gunmetal.

As Per IS 9669-1980 & IS 2720 (Part XVI) - 1979.

The apparatus is used to determine permeability of soils using a constant or variable head.

This test is recommended for soils with coefficient of permeability in the range of 10-3 to 10-7 cm / sec. The maximum particle size of the soil, which can be tested in the mould is 10 mm.

The equipment comprises the followings:
> Gun Metal Mould. 100 mm ID x 127.3 mm High x 1000 ml Volume.
> Extension collar of G. M. 100 mm Dia x 60 mm High for the above mould.
> G.M. Drainage Base Plate with a recess for a porous stone and with an outlet valve.
> Metallic Clamping Ring.
> Gun Metal Drainage Cap (Top Plate with a recess for a porous stone and fitted with an outlet valve and an air release valve).
> Porous Stone for Drainage Cap.
> Porous Stone for base plate.
> Set of three Glass Stand Pipes approximately 6, 10 and 20 mm Dia mounted on a wooden board. To read water head, 2 Nos. meter scales are fixed between the tubes.
> A 3-meter long rubber tubing with a pinch cock is also provided.

As per IS 2720 (PART XVII) - 1966.

The apparatus is used to determine permeability of soils using a constant or variable head.

This test is recommended for soils with coefficient of permeability in the range of 10-3 to 10-7 cm / sec. The maximum particle size of the soil, which can be tested in the mould is 10 mm.

The equipment comprises the followings:
> Gun Metal Mould. 100 mm ID x 127.3 mm High x 1000 ml Volume.
> Extension collar of G. M. 100 mm Dia x 60 mm High for the above mould.
> G.M. Drainage Base Plate with a recess for a porous stone and with an outlet valve.
> Metallic Clamping Ring.
> G.M. Drainage Cap (Top Plate with a recess for a porous stone and fitted with an outlet valve and an air release valve).
> Porous Stone for Drainage Cap.
> Porous Stone for base plate.
> Set of a Stand with Nine Glass Pipes of approximately 6, 10, 20, 25, 40, 50, 60, 70, 75 mm bore. 75 mm bore tube is provided with an overflow arrangement for constant head tests. The remaining tubes are used for falling head tests.
> A 3-meter long rubber tubing with a pinch cock is also provided.

As per IS 2720 (PART XVII) - 1966.

Moisture contents at which soil has smallest plasticity is called limit. For determination purpose plastic limit is defined as the water content at which a soil will just begin to crumble when rolled into a thread of 3 mm Dia.

The Complete set comprises of followings.
> Glass Plate 20 cm x 115 cm having ground ends and one side frosted. Brass or S.S. rod of 3 mm Dia x 150 mm Long.
>Flexible spatula.
>Set of 6 moisture container of 50 mm x 50 mm.
> Porcelain Dish of 150 mm Dia.

As per IS 2720 (Part VII) - 1980.

As Per IS 1888-1963.

This is for estimating the bearing capacity of shallow foundation in situ and for the design of flexible pavement. In the test procedure a steel plate is subjected to gradually increasing load and settlements of the plates recorded.

Maximum bearing capacity is noted as that load at which the plate starts sinking rapidly.

The basic outfit consists of the followings:
> 50 Tone Hydraulic Jack with separate pumping unit with a 0-500 KN x 0.5 KN Pressure Gauge and Flexible Metal Pipe 5
> Special Ball & Socket arrangement between the jack and the bearing plate. 1 No.
> Extension Rod 12 mm Dia x 25 cm Long for taking Dial Gauge readings. 16 Nos.
> Magnetic Base with female thread on top for holding extension rod. 4 Nos.
> Top End Plate, 50 mm Dia with male thread for fitting onto the extension rods and positioning the Dial Gauge Plunger.
4 Nos.
> Column 15 cm Dia x 25 cm Long with flanges complete with four bolts and nuts. 2 Nos.
> Column 15 cm Dia x 50 cm Long with flanges complete with four bolts and nuts. 1 No.
> Datum Bar Light Weight, Portable, 5 mtr. Span and stands approximately 30 cm High, mounted on two removable legs. Made of 2 Parts. 1 Set.

This is as per the principals outlined in the book "Measurement of soil properties in triaxial tests" by A.W. Bishop and D. J. Henkel. This is used as an accessory for triaxial test apparatus. This apparatus is used for measuring pore water pressure and pore air pressure in soils. The apparatus consists of a Panel for wall mounting on which is having following fittings:

> A bourdon type, 20 cm Dia, Pressure Gauge having range 10 kg/cm² or 20 Kg/cm² is fitted.
> Glass U-tube manometer for measuring low positive pore pressures, negative pore pressures and checking zero error of pressure gauge. It is provided with a mercury trap (Mercury supplied at extra cost), Null indicator made out of clear transparent Perspex with mercury trap and cursor to indicate the mercury level.
> 50 ml Burette for measuring the volume change in the soil specimen. Pressure pump fitted with four sleeve packed valves. Operated by means of a hand wheel on the end of the piston rod which is threaded through the pump cap and gives a smooth, fine adjustment of pressure.
> Copper coil and water reservoir.

Compaction test is used to determine the Optimum Moisture Contents (O.M.C.) and Maximum Dry Density (M.D.D.) of Soils.

Consists of the followings:

Made of Mild Steel. Dia 100 mm; Height 127.3 mm; Volume 1000 cc. Complete with base plate and collar.

As Per IS: 10074-1982 & 2720 (PART-VII) - 1980.

Compaction test is used to determine the Optimum Moisture Contents (O.M.C.) and Maximum Dry Density (M.D.D.) of Soils.
Consists of the followings:
Made of Mild Steel. Dia 150 mm; Height 127.3 mm; Volume 2250 cc. Complete with base plate and collar.

RAMMERS - SOIL COMPACTION. 4.89 Kg..
Weight: 4.89 Kg; Controlled Drop: 410 mm.

As Per IS: 10074-1982 & 2720 (PART-VIII) - 1983.

Used for quick evaluation of maximum soil density in the field. Standard Compaction curves showing moisture contents versus densities are shown in laboratory using standard compaction method and penetration of the proctor needles are correlated.
Proctor Needles are also known as Proctor Penetrometer.

PROCTOR NEEDLES - SPRING TYPE.
Consists of a needle attached to a spring loaded plunger, the stem of which is calibrated to read 0 to 40 kg in 1 kg Division. Long stem is graduated at every 12.5 mm to read depth of penetration and for use with needles of larger areas. The small penetration is also graduated in 12.5 mm division and used with needle of small areas. Needle points one each of 0.25, 0.5, 1.0, 1.5, 2.0, 3.5 and 6.0 cm². and one Tommy pin is supplied with the instrument in a nice carrying wooden case

PROCTOR NEEDLES - HYDRAULIC TYPE.
This is identical to spring type Proctor Needle, except that the penetration pressure on the needle is conveyed through a hydraulic system to a hydraulic pressure gauge. This system permits a great control over rate of penetration because of better visibility of load indication. Comprises hydraulic proctor needle system complete with a pressure gauge fixed at easily readable angle reading 070 Kg x 2 kg. A set of needle points consisting one each of 0.25, 0.5, 1.0, 1.5, 2.0, 3.5 and 6 cm2. and one Tommy pin.

Graduation at every 12.5 mm to indicate depth of penetration are marked on longer stem for use with needles of larger areas. Smaller stem is also graduated at every 12.5 mm and is used with needles of smaller areas. Complete as above in a wooden carrying case.

Having Capacity of 10 KN/1000 Kg./ 1.00 Tone Supplied complete with our own calibration certificate.

PROVING RING COMPRESSION TYPE. 25 ΚΝ.

Having Capacity of 25 KN/2500 Kg./2.50 Tone Supplied complete with our own calibration certificate.

PROVING RING COMPRESSION TYPE. 50 ΚΝ.

Having Capacity of 50 KN/5000 Kg./5.00 Tone Supplied complete with our own calibration certificate.

As Per IS 9198-1979 & IS 2720 (Part XVI) - 1979. Weight: 2.6 Kg; Controlled Drop: 310 mm.

As Per IS 9198-1979 & IS 2720 (Part XVI) - 1979. Weight: 2.6 Kg; Controlled Drop: 310 mm.

Used to determine the relative density index of cohensionless soils.

The equipment comprises the followings.:
> Vibratory Table with a cushioned steel vibrating deck about 75 cm x 75 cm. It has a frequency of approximate 3600 vibrations per minute under a 115 kg load. Amplitude is variable in between 0.65 mm in steps of 0.05 to 0.25 mm, 0.25 to0.45 mm and 0.45 to 0.65 mm. Suitable for operation on 415 Volts, Three Phase Supply.
> Cylindrical Metal Unit Weight Mould of 3000 ml. Capacity.
> Guide Sleeve with Clamp assembly.
> Surcharge Base Plate for Mould.
> Handle for Surcharge Base Plate.
> Surcharge Weight. The total weight together with surcharge base plate and handle is equivalent to 140 kg/cm² for mould.
> Cylindrical Metal Unit Weight Mould of 15000 ml. Capacity.
> Surcharge Weight For Cylindrical mould of 15000 ml. Capacity. The total weight together with surcharge base plate and handle is equivalent to 140 kg / cm² for mould.
> Dial Gauge Holder And Calibration Bar 75 x 300 mm x 3 mm.

As per IS 2720 (Part XIV) - 1983.

It consists of a 5 Ton Capacity hand operated, hydraulic jack mounted on a suitable frame. Two plungers, one of 100 mm Dia and the other of 150 mm Dia moulds are supplied. One thrust plate for 150 mm Dia and one for 100 mm Dia specimens are also supplied. Height of Thrust plate is also adjustable.

Set of plunger adopters thrust plates for 38 mm, 50 mm and 75 mm Dia Specimen.

As Per IS 2720 (PART-XXVIII).

Comprises of a frame designed for screw jack operation, one each of the adaptor plates and plunger adaptors for 38 mm, 75 mm, 100 mm and 150 mm Dia specimens and a stand to obtain simultaneously three 38 mm Diameter samples from one 100 mm Diameter Samples. The adaptor plate, which slides along the slotted supports, can be clamped at any desired position by means of locking nuts. Besides this, the tube or mould can be held in position by raising the tube guides and held in position with locking screws. The lead screw movement can be stopped at any predetermined position by tightening the lead screw-locking collar. Plunger adaptor for 200 mm Dia samples. Adaptor plate with 200 mm Dia hole and device to extract 3 numbers of 38 mm Dia samples.

Used to collect disturbed soil samples at reasonable depths for laboratory test. Augers are available in two types.

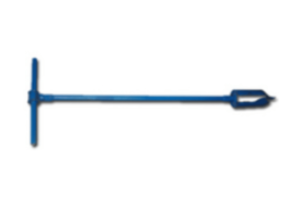
Sampling Auger Outfit, Blade type (Post Hole) Auger Head with one meter long rod and 'T' piece handle.

As Per ASTM D 1452.

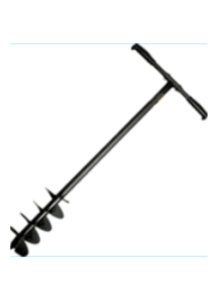
Used to collect disturbed soil samples at reasonable depths for laboratory test. Augers are available in two types. With one meter long extension Rod, 'T' piece handle.

Undisturbed samples of soil at different depths can be collected using these sampling tubes. The kit includes all necessary implement for boring, collection and sealing with wax. The operation may carried out either using a tripod stand or without it. The equipment is supplied in a canvas carrying case.

Consists of:
> One Auger 150 mm Dia head, blade type, with one meter long extension rod and Tee piece handle.
> Five Extension Rod 1 mtr. Long x 37.5 mm Dia.
> Two Spanners to tight the rods.
> One Large Jarring Link for driving samplers 50 mm, 100 mm and 150 mm Dia.
> This can be connected to the sampler or to the extension rod.
> One Eye Hook
> One Wax Container.
> One Methylated Spirit Stove.
> One Wax ladle.
> One Nice Carrying Case to carry all above.

Consists of:

> One Sample Extractor, screw type with a wire sample trimmer.
> One Split Mould of 38 mm Dia x 76 mm long.
> One Split Mould of 38 mm Dia x 88 mm long (in 2 Parts) can be fitted to the screw type extractor enabling soft specimen to be prepared ready for unconfined compression test. They are fitted with quick release clamps.
> One Sampling Tube of 38 mm Dia x 150 mm Long.
> One Sampling Tube of 38 mm Dia x 200 mm Long.
> Jarring Link for driving the sampling tube.
> Adapter with locking screw for fitting the sampling tube to jarring link.

For collecting undisturbed samples of 38 mm Dia for Triaxial Shear Strength and Unconfined Compression Strength either straight from the field or from a sample of larger Diameter.

The wall thickness is maintained approximately 1.6 mm with an area ratio approximately 17%. The internal diameter is relieved by about 0.5 mm (Inside clearance 2%) beyond approximately 19 mm length from the cutting edge of the tube. This is most suitable for highly cohesion soils. Available in the following different sizes.:

For collecting undisturbed samples of 38 mm Dia for Triaxial Shear Strength and Unconfined Compression Strength either straight from the field or from a sample of larger Diameter.

The wall thickness is maintained approximately 1.6 mm with an area ratio approximately 17%. 38 mm internal Diameter uniform through out. This is most suitable for soils of low cohesion. Available in the following different sizes.

The apparatus consists of Plastic Measuring Cylinder 4 Nos, Weighted Foot Assembly 1 No., Irrigator Tube 1 No., Rubber Tubing Complete with Pinch Clip 1 No., Syphon Assembly with 5 Ltr Polythene Bottle 1 No and Funnel - 1 No. Complete in Wooden Carrying Case and Required Chemicals and Electrically Operated Shaker.

As per IS 2720 (Part XXXVII) - 1976.

Used to determine shrinkage limit and to calculate other shrinkage factors like ratio, shrinkage index and volumetric shrinkage.

Consists of a prong plate of acrylic sheet 1.5 mm thick and 75 mm square, Shrinkage Dish, Glass Cup, Porcelain Evaporating Dish, Steel Straight Edge, Graduated Glass Cylinder 25 ml x 0.5 ml. Without mercury.

As per IS 2720 (Part VII) - 1980.

Used for grain size analysis of soils, where more than 10% of the material will pass through 75 micron sieve.

Manufactured from clear transparent glass having uniform clarity throughout the upper end on which density scale is engraved. The scale range is 0.995 to 1.030 density (gm/cc) at 27° C. Smallest scale is 0.0005.

As Per IS 2720 (Part IV) - 1985.

As Per IS 21311963.

This is used for standard penetration test for determining penetration resistance (N valve) of soil which can be related to unconfined compressive strength.

Penetration resistance (N value) of soil is determined by giving a number of blows with a 65 kgs weight falling through a given distance of 75cm required to penetrate the assembly to a depth of 30 cm when properly seated on the ground.

The sampler is made from a steel tube split length wise & held together by a head fitted with a ball check valve & a hardened steel shoe in size cutting edge of 35mm dia. The sampler is of 35 mm Internal Dia & 50.8 mm in Outer Dia & 508 mm long. One adopter to connect 'A' type drill rods is also supplied.

As Per IS 2720 (Part XVI) - 1979.
It is designed to determine the swelling pressure developed by soil specimens moulded to desired densities at knows moisture contents when soaked in water.

The load applied to restrain the swelling is transferred to a load measuring proving ring through a perforated swell plate and a load transfer bar. The proving ring is attached to the lead screw of hand operated load frame. A soaking tank is provided for saturating the specimen and the base of the mould has channels and radial grooves with connecting holes.

Consists as below:
LOAD FRAME - HAND OPERATED. 50 KN.
Hand Operated. Capacity: 50 KN.

PROVING RING COMPRESSION TYPE. 25 ΚΝ.
Having Capacity of 25 KN/2500 Kg. / 2.50 Tone Supplied complete with our own calibration certificate.

DIAL GAUGE - CHINESE. 30 mm Travel x 0.01 mm Division.
Range: 0-30 mm; Least Count: 0.01 mm.

POROUS STONE-PAIR. 100 mm.
Dia: 100 mm; Thick 12.7 mm.

PERFORATED BRASS SWELL PLATE.
Dia: 100 mm; Thickness: 100 mm. Complete with adjustable stem and lock nut - gunmetal.

SPACER.
Dia: 100 mm; High: 12.7 mm. Complete with detachable handle.

LOAD TRANSFER BAR & BALL.
One Load Transfer Bar and one steel ball.

SOAKING TANK. 250 mm.
Dia: 250 mm; Height: 210 mm.

SWELL TEST APPARATUS WITH MILD STEEL MOULD.
Complete with SWELL TEST MOULD. M.S. 1000cc. having 100 mm Dia & 127.3 mm Height.

SWELL TEST APPARATUS WITH GUNMETAL MOULD.
Complete with SWELL TEST MOULD. G.M. 1000cc. having 100 mm Dia & 127.3 mm Height.

As Per IS 2720 (Part XII) - 1981.

It is a transparent Perspex chamber with anvil and loading plunger. The cell can be opened easily by releasing four nuts of the tie rods. It is leak proof up to 10 kg/cm² fluid pressure.

An oil plug, which can also be used as an air vent is provided for introducing a thin layer of oil over water. This provides effective sealing at the plunger for long duration tests. The cell is fitted with four sleeve packed valves of no volume change type on the base. These valves are used for cell pressure, pore water pressure, drainage or backpressure. The loading plunger has a dial gauge rests.

Used for 38 mm Dia Specimen. Comprises with:
> Loading pad made of Perspex for 38 mm Dia specimens.
> Pair of plain discs made of Perspex 38 mm Dia x 6 mm thick.
> Pair of porous stones 38 mm Dia x 6 mm thick.
> Split sand former for 38 mm Dia specimen.
> Sheath stretcher for 38 mm Dia specimen.
> One dozen rubber sheaths for 38 mm Dia samples.
> Four Synthetic rubber 'O' rings for 38 mm Dia specimen
> One plastic drainage tube.

As Per IS 2720 (Part XII) - 1981.

It is a transparent Perspex chamber with anvil and loading plunger. The cell can be opened easily by releasing four nuts of the tie rods. It is leak proof up to 10 kg/cm² fluid pressure.

An oil plug, which can also be used as an air vent is provided for introducing a thin layer of oil over water. This provides effective sealing at the plunger for long duration tests. The cell is fitted with four sleeve packed valves of no volume change type on the base. These valves are used for cell pressure, pore water pressure, drainage or backpressure. The loading plunger has a dial gauge rests.

Used for 38, 50, 75 and 100 mm Dia Specimens. Comprises with:
> Brass Pedestal for 38 mm, 50 mm, 75 mm and 100 mm Dia Specimens.
> Perspex Loading pad for 38 mm, 50 mm, 75 mm and 100 mm Dia Specimen.
> Pair of plain discs for 38 mm, 50 mm, 75 mm and 100 mm Dia.
> Pair of porous stone one each for 38 mm, 50 mm, 75 mm and 100 mm Dia Samples.
> Split sand former for 38 mm, 50 mm, 75 mm and 100 mm Dia Specimens.
> Sheath stretcher for 38 mm, 50 mm, 75 mm and 100 mm Dia Specimens.
> One dozen sheaths for 38 mm, 50 mm, 75 mm and 100 mm Dia Specimens.
> Four Synthetic Rubber 'O' Rings for 38 mm, 50 mm, 75 mm and 100 mm Dia specimen.
> Set of four slotted ring spacers for sand formers and four pairs of polythene drainage tubes.

As Per IS 2720 (Part XII) - 1981.
For determining the triaxial shear strength of soil specimens of 38 mm Dia Specimen. The length to diameter ratio of sample is 1:2.

TRIAXIAL CELL. STATIONERY BUSHING.
Complete with all the accessories like Loading pad made of Perspex for 38 mm Dia specimens, Pair of plain discs made of Perspex 38 mm Dia x 6 mm thick. Pair of porous stones 38 mm Dia x 6 mm thick, Split sand former for 38 mm Dia specimen, Sheath stretcher for 38 mm Dia Specimen, One dozen rubber sheaths for 38 mm Dia samples, Four Synthetic rubber 'O' rings for 38 mm Dia specimen and One plastic drainage tube.

LOAD FRAME. 50 KN. EIGHT SPEEDS. MOTORISED.
Having eight speeds of 1.25, 0.625, 0.5, 0.25, 0.125, 0.0625, 0.05 & 0.025 mm/min. Electrically Operated on 230. volts, 50 Hz,, Single Phase, AC supply.

CONSTANT PRESSURE SYSTEM OIL WATER. 20 Kg / cm2.
Capacity 20 kg/cm². Supplied complete with Pressure Gauge, flow valves, connecting Pressure hose and set of weights to give maximum pressure of 20 bar (20 kg/cm²).

LOAD FRAME. 50KN. THIRTY SPEEDS. MOTORISED.
Having thirty speed From 6.00 mm / min to 0.00048 mm / min. Electrically Operated on 230 volts, 50 Hz,, Single Phase, AC supply.

As Per IS 2720 (Part XII) - 1981.
For determining the triaxial shear strength of soil specimens of 38, 50, 75 and 100 mm Dia Specimen.

TRIAXIAL CELL. UNIVERSAL STATIONERY BUSHING.
For 38, 50, 75 and 100 mm Dia Specimens. Complete with Brass Pedestal for 38 mm, 50 mm, 75 mm and 100 mm Dia Specimens, Perspex Loading pad for 38 mm, 50 mm, 75 mm and 100 mm Dia Specimen, Pair of plain discs for 38 mm, 50 mm, 75 mm and 100 mm Dia, Pair of porous stone one each for 38 mm, 50 mm, 75 mm and 100 mm Dia Samples, Split sand former for 38 mm, 50 mm, 75 mm and 100 mm Dia Specimens, Sheath stretcher for 38 mm, 50 mm, 75 mm and 100 mm Dia Specimens, One dozen sheaths for 38 mm, 50 mm, 75 mm and 100 mm Dia Specimens, Four Synthetic Rubber 'O' Rings for 38 mm, 50 mm, 75 mm and 100 mm Dia specimen and Set of four slotted ring spacers for sand formers and four pairs of polythene drainage tubes.

LOAD FRAME. 50 KN. EIGHT SPEEDS. MOTORISED.
Having eight speeds of 1.25, 0.625, 0.5, 0.25, 0.125, 0.0625, 0.05 & 0.025 mm/min. Electrically Operated on 230 volts, 50 Hz,, Single Phase, AC supply.

CONSTANT PRESSURE SYSTEM OIL WATER. 20 Kg / cm2.
Capacity 20 kg/cm². Supplied complete with Pressure Gauge, flow valves, connecting Pressure hose and set of weights to give maximum pressure of 20 bar (20 kg/cm²).

LOAD FRAME. 50KN. THIRTY SPEEDS. MOTORISED.
Having thirty speed From 6.00 mm/min to 0.00048 mm / min. Electrically Operated on 230 volts, 50 Hz,, Single Phase, AC supply.

As Per IS 2720 (Part X) - 1991.
To determine the unconfined compression strength of 38 to 100 mm Dia soil specimen. The shearing strength of the soil is generally taken to be one half of the unconfined compression strength.

Comprises is of either Hand Operated or Motorised Load Frame having capacity of 50 KN to apply load. Complete with one Adaptor for Proving Ring and Conical seats and male-female conning tools for 38 mm Dia samples. Supplied without Proving Ring and Dial Gauge.

UNCONFINED COMPRESSION TESTER - HAND OPERATED.
Complete with LOAD FRAME-HAND OPERATED. (LFH-050K).

UNCONFINED COMPRESSION TESTER MOTORISED. SINGLE SPEED.
Complete with LOAD FRAME. MOTORISED. BENCH TYPE. 50 KN. SINGLE SPEED. (LFMB-50K01) of 1.25 mm / min.

UNCONFINED COMPRESSION TESTER - MOTORISED. THREE SPEED.
Complete with LOAD FRAME. MOTORISED. BENCH TΥΡΕ. 50 ΚΝ. THREE SPEEDS. (LFMB-50K03) of 1.25, 1.5 and 2.5 mm / min.

As Per IS 2386 (PART I) - 1963.
As Per IS 2720 (Part V) 1985 & IS 11196 - 1985.

It is used to determine the liquid limit of soil.

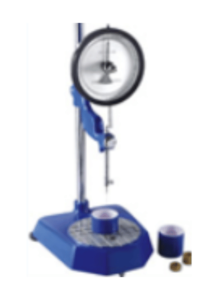
It consists of a accurately machined aluminum base with in set sprit level. Adjustable feet are provided in the base for leveling. The unit is supplied with built in timer to control the duration of penetration which is preset to 05 seconds. The instrument is provided with lead screw gear arrangement, leveling screws, sprit level. The instruments is supplied with arrangement for adjusting the height of cone as per the specimen. The instruments consists of Penetration Test Cone of Stainless Steel 35mm long with an angle of 30° and Penetration Test Cup having diameter of 55mm and 40 mm depth. Complete with Timer Box.

When conducting triaxial tests on soil samples, it is observed that due to internal pressure, the cell expands, soil specimen consolidates resulting in the change of volume. Volume Change Gauge is therefore developed to accurately measure volume changes. This is measured by observing the quantity of water entering or leaving the cell as the cell pressure and axial load are changed it is achieved by the displacement of free surface between the water supplied to the cell and another fluid (paraffin or kerosene). A dye is sided to the paraffin for clear demarcation of the interface.

The unit consists of a glass-graduated tube of the appropriate capacity graduated to parts of a ml. enclosed in a

Perspex tube sealed by two end caps. The unit is fitted with manifolds and valves which enable it to be used with the triaxial cell and the constant Pressure (Mercury controls) system.

The cell pressure can either be directly applied to the cell from the constant pressure system or through the volume change gauge. The graduated glass tube is not subjected to reduce the error in meniscus.

There is an arrangement for filling the unit with water and paraffin and a drainage valve is provided in the lower end cap. The whole assembly is mounted on a panel suitable for wall mounting. The unit is supplied complete with a pressure hose with end couplings and a packet of dye.

Tincidunt wisi euismod iaculis nunc vita

Nostra dapibus varius et semper semper rutrum ad risus felis eros. Cursus libero viverra tempus netus diam vestibulum lorem tincidunt congue porta. Non ligula egestas commodo massa. Lorem non sit vivamus convallis elit mollis. Viverra sodales feugiat natoque sem morbi hac nunc ultricies nibh netus facilisis blandit. Felis purus et iaculis. Semper orci duis montes curabitur potenti a varius quis diam, vel litora et? Quis ridiculus pharetra luctus augue duis.

Parturient tortor tortor sed tellus molestie neque

BITUMEN TESTING INSTRUMENTS

As per ASTM D 2172; AASHO T 58 & T 164.

BITUMEN TESTING INSTRUMENTS

Bitumen Extractor. Electrically Operated.

For quantitative determination of bitumen percentage in hot mix paving mixture and pavement samples.

Consists of removable Aluminium rotor bowl of 1500 gm capacity with a cap mounted on vertical Shaft and enclosed in a liquid tight cast housing.

This bowl, which is mounted on a vertical shaft, can be rotated by the handle or an electric motor, which is connected with the gears and shaft in a cast body. The solvent can be introduced through the hole in the cap of housing during the test. A drain is provided to collect the dissolved bitumen coming out of the rotating bowl and getting collected in the housing.

An electric motor coupled to the gearbox to rotate the shaft and the drive through a step pulley. Suitable for operation on 230 Volts, Single phase, AC supply.

Porta tellus aliquam ligula sollicitudin

Lorem ipsum dolor sit amet, consectetur adipiscing elit, sed do eiusmod tempor incididunt ut labore et dolore magna aliqua. Ut enim ad minim veniam, quis nostrud exercitation ullamco laboris nisi ut aliquip ex ea commodo consequat.
” Lorem ipsum dolor sit amet, consectetur adipiscing elit, sed do eiusmod tempor incididunt ut labore et dolore magna aliqua. Ut enim ad minim veniam, quis nostrud exercitation ullamco laboris nisi ut aliquip ex ea commodo consequat. “

Tincidunt wisi euismod iaculis nunc vita

Nostra dapibus varius et semper semper rutrum ad risus felis eros. Cursus libero viverra tempus netus diam vestibulum lorem tincidunt congue porta. Non ligula egestas commodo massa. Lorem non sit vivamus convallis elit mollis. Viverra sodales feugiat natoque sem morbi hac nunc ultricies nibh netus facilisis blandit. Felis purus et iaculis. Semper orci duis montes curabitur potenti a varius quis diam, vel litora et? Quis ridiculus pharetra luctus augue duis.

Parturient tortor tortor sed tellus molestie neque

Used to measure Thickness of all kind of Bitumen Layer.

Used for determining the ductility of asphalted bitumen and fluxed native asphalt cutback bitumen and blown type bitumen.

Ductility is defined as distance in centimeter to which a standard briquette of bitumen can be stretched before the thread breaks. The briquette is stretched at a rate of 50 mm / min ± 2.5 mm/min at a temperature of 27° C ± 0.5° С.

The apparatus consists of a Water Bath having inner chamber made of Aluminium and fitted with heater and a circulating pump to maintain uniform temperature. Temperature is controlled by a Thermostat / Digital Temperature controller cum indicator.

One half of the briquette moulds is fixed on a fixed plate in the water bath and other half of the briquette mould is fixed to a carrier, which slides over a rotating threaded shaft with a clutch.

The motor and gears to rotate the shaft are housed in a cabinet fixed above the other end of the water bath. A pointer is fixed to the carrier moves over a scale graduated from 0 100 cm x 1 mm fixed on the bath with "0" (Zero) of the scale towards the fixed plate side. The rotating shaft has two speeds of travel for the bracket, 50 mm/min and 10 mm/min, which can be selected by a clutch. Complete with three briquette moulds and one base plate, all made of brass. Suitable to operate on 230 Volts, 50 Cycles, Single phase and AC supply

As Per IS 1208-1958; ASTM D 113 & IP 3255.

As per IS 1448 (P-69) 1969; ASTM D 92 & IP 36.

Used for determining the flash and fire points of all petroleum Products except fuel oil and those having an open cup flash point below 79.5° C (175 °F).

The cup is of brass chromium plated and is fitted with an ebonite handle. The test flame assembly is fitted at the side of the instrument. A Sensor of Digital Temperature Indicator or stem of glass thermometer may be placed in the cup through a clip, which is attached to a stand on the opposite side of the flame assembly. The test flame, nozzle returns to its original position after application of test flame. The electrically operated heater with 750 watts elements is provided either with Energy Regulator or with Voltage Variac Controller. The heater casing is coloured with black wrinkle colour. Complete with Oil & Gas test jet.

As per IS 1212-1978 & IP 45.

This apparatus is used to determine loss on heating of asphaltic bitumen.

Consists of a double walled Hot Air Oven of specified inside dimensions and fitted with hinged door containing a double glass window. Heating of oven is maintained within the specified limits either with sensitive thermostat or Dual Display Microprocessor Based Digital Temperature Controller cum Indicator. A perforated self (Round) rotates inside the oven horizontally at a speed of 5 to 6 RPM and carries Aluminium sample containers. Inner Chamber size is 400 x 400 x 400 mm.

The Specimen Holder to hold 100 mm Dia Mould is fitted on the top of the pedestal.

This equipment is to speed up the process to cylindrical specimens for Marshal Stability Testing Machine with ease and accuracy. The compactor has been designed to simulate hand compaction as described in ASTM D 1559. This machine compact the samples automatically and stops when desired preset numbers of blows have been completed. The compactor gives uniform and accurate marshal moulds for reliable testing.

It is a motor driven mechanical compactor useful to compact 100 mm Dia moulds. It is fitted with a compaction rammer of 985 mm Dia, weighing 4.5 Kg with a free fall of 457 mm. The rammer assembly is provided with a ratchet and pawl arrangement to lift it from the top of the test samples. When the rammer reaches the required height, the pawl releases the rammer, which falls freely on the test specimen. The release mechanism is connected by an arm moving up and down, which is connected to a reduction gear coupled to the motor through another arm. An automatic Electronic blow counter is used to set the desired number of blows. The Compactor is supplied complete with wooden pedestal. Suitable work on 230 V, 50 Hz, Ac Single Phase


10.16 cm (4") I.D. x 7.6 cm High with Base Plate and Extension Collars of 4.1/8" I.D..

As Per ASTM D 1559-T-62.

It is used to measure the resistance to plastic flow of cylindrical specimens of bituminous having mixture loaded on the lateral surface.

This apparatus is meant for determination of softening point of bituminous materials.
The Apparatus consists of a Glass Beaker of Heat resistant Glass of Internal Dia 8.5 cm x 12 cm Depth (Approx.), Two steel balls each of 9.5 mm Dia, Two Tapered Brass Rings, Two ball Guides, Ring Stand and a hand stirrer.

As Per IS 1205-1978 & IP 58

Construction. Double walled. Inside made of Stainless Steel. Outer Chamber made of CRC / G.I. duly Powder Coated.

Gap between the walls filled with glass wool.

Cooling Arrangement. Built in CFC Free refrigeration system with hermetically sealed compressor. Provided drain facility.

Temperature Range: 10° C to 100° C

Temperature Controlled. By Dual Display Microprocessor Based Digital Temperature Controller with PT-100 sensor.

Control Accuracy. ± 0.1° С.

Standard Supply. Provided with FHP motorised Stirrer for uniform temperature and Three Core Wire and Plug. Operated On: 230 V, 50 Hz, Single Phase, AC supply.

As per IS 1202 - 1978.

Useful to determine specific gravity of semi-solid bitumen, road tars and creosote & anthracene oil. Made from Borosilicate Glass.

As per IS 310; IS 1203; IS 1448; IP 60; IP 49; IP 50, ASTM D5, D 217 & D 637. This apparatus helps in penetration test to determine consistency of bitumen for the purpose of grading.

The apparatus consist of a cast Aluminium base with leveling foot screws and a vertical pillar is mounted, on which an Aluminium arm moves up & down freely. A 6 inch Dial is fixed on this arm and brass chromium plated rod slide through the lower portion of the arm. A needle with weights (50 gm or 100 gm) may be fitted to this rod. Fine adjustment of the arm to touch the surface of the sample may be done by screw system. The Dial is graduated from 0400 in 1/10th millimeter sub division.

Supplied complete with adjustable needle holder, penetration needle, sample containers and weight of 50 & 100 gm.

Useful for the testing method of as per IS 6241: 1971.
For determining Stripping Value of Bituminous mixes having aggregate size of 1.0 mm to 75 microns.

A circular tray rotates in a vertical plane at a rate of approximately 100 RPM by an electric geared motor. 4 bottles of approximately 400 cc are mounted on this circular tray at an angle of 90° to each other with their with their mouth towards centre of the tray. A time switch is provided. Suitable for operation on 230 Volts A.C. Single Phase

MEASURING INSTRUMENTS

As per ASTM D 2172; AASHO T 58 & T 164.

MEASURING INSTRUMENTS

Dial Gauge - Baker.

Make: BAKER.

Sturdy and robust dial gauges, fitted with Swiss brass bush bearings, supplied with tolerance pointers. Strong and smooth metal bezel. Metric gauges conform to IS2092- 1983 and for the European market to DIN878-1983. Inch gauges conform to ASME B89.1.10M-2001. Each gauge carries a calibration certificate giving actual values.

Range: 0-25 mm; Least Count: 0.01 mm.
Range: 0-5 mm; Least Count: 0.002 mm.
Range: 0-12 mm; Least Count: 0.002 mm.

Porta tellus aliquam ligula sollicitudin

Lorem ipsum dolor sit amet, consectetur adipiscing elit, sed do eiusmod tempor incididunt ut labore et dolore magna aliqua. Ut enim ad minim veniam, quis nostrud exercitation ullamco laboris nisi ut aliquip ex ea commodo consequat.
” Lorem ipsum dolor sit amet, consectetur adipiscing elit, sed do eiusmod tempor incididunt ut labore et dolore magna aliqua. Ut enim ad minim veniam, quis nostrud exercitation ullamco laboris nisi ut aliquip ex ea commodo consequat. “

Tincidunt wisi euismod iaculis nunc vita

Nostra dapibus varius et semper semper rutrum ad risus felis eros. Cursus libero viverra tempus netus diam vestibulum lorem tincidunt congue porta. Non ligula egestas commodo massa. Lorem non sit vivamus convallis elit mollis. Viverra sodales feugiat natoque sem morbi hac nunc ultricies nibh netus facilisis blandit. Felis purus et iaculis. Semper orci duis montes curabitur potenti a varius quis diam, vel litora et? Quis ridiculus pharetra luctus augue duis.

Parturient tortor tortor sed tellus molestie neque

Sturdy plastic body with taper end, slides easily into pocket fitted with 3 vials-horizontal, vertical and 45 Magnetic base acts as 3rd, hand. Can be used as a rule with graduated edge available optionally

Complete with Calibration Certificate.

Make: CHINESE
DIAL GAUGE - CHINESE. 30 mm Travel x 0.01 mm Division.
Range: 0-30 mm; Least Count: 0.01 mm.

"FREEMAN'S" Make.
These Measuring tapes are made of Fiber Glass yarn coated with tough plastic polyvinylchloride (PVC). Complete with Calibration Certificate.

"FREEMAN'S" Make

A general purpose tape woven to width with copper wires lengthwise for additional strength. Coated with special paints for protection against moisture, wear & tear. Complete with Calibration Certificate.

"FREEMAN'S" Make.
Tempered, high carbon steel blade, phosphate and covered with special enamel to withstand corrosion and rust. Printing is protected with wear-resistant lacquer for long-life. Complete with Calibration Certificate.

MICROMETER SCREW. ELECTRONIC. (CHINESE). 00-25 mm x 0.001 mm Least Count.

Complete with Calibration Certificate.

MICROMETER SCREW. PLAIN. 25 x 0.01 mm. AEROSPACE. (CHINESE). 00-25 mm x 0.01 mm Least Count.
Complete with Calibration Certificate.

Complete with Calibration Certificate.

RIGHT ANGLE (BEVEL EDGE SQAURE) - GERMAN MAKE.

150 mm x 100 mm.

Complete with Calibration Certificate.

RIGHT ANGLE (BHARAT SAMRAT MAKE) - INDIAN. 6"

To measure the length of Roads, Grounds, Bridges etc. Also called as ROADOMETER.

Stainless Steel Rules made from high grade stainless steel rules with metric graduations. Complete with Calibration Certificate.

STAINLESS STEEL SCALE (RULES). 300 mm.
With Calibration Certificate.

VERNIER CALIPERS - DIAL. (CHINESE). 6" x 0.001" Least count
With Calibration Certificate

VERNIER CALIPERS - PLAIN. (CHINESE). 6" / 150 mm x 0.001" / 0.02 mm Least count.
With Calibration Certificate.

ROAD & PAVEMENT TESTING INSTRUMENTS

This device is used to measure deflections of flexible pavements.

ROAD & PAVEMENT TESTING INSTRUMENTS

Benkelman Beam Test Apparatus.

The lightweight instrument is supplied in two parts for assembling on site with easy hand tools. In use one end of the beam rests at a point under investigation, while the beam is pivoted at the centre. The other end is kept on a stable platform. The beam ratio is 2:1, which magnifies even small deflections. Supplied with a dial gauge of 0.01mm x 25 mm travel. This is a lightweight, dismantle able instrument, easy to carry.
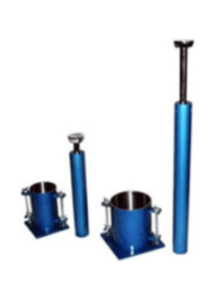
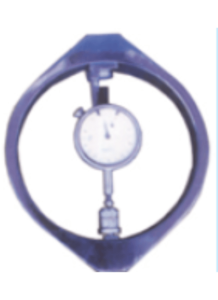
Porta tellus aliquam ligula sollicitudin

Lorem ipsum dolor sit amet, consectetur adipiscing elit, sed do eiusmod tempor incididunt ut labore et dolore magna aliqua. Ut enim ad minim veniam, quis nostrud exercitation ullamco laboris nisi ut aliquip ex ea commodo consequat.
” Lorem ipsum dolor sit amet, consectetur adipiscing elit, sed do eiusmod tempor incididunt ut labore et dolore magna aliqua. Ut enim ad minim veniam, quis nostrud exercitation ullamco laboris nisi ut aliquip ex ea commodo consequat. “

Tincidunt wisi euismod iaculis nunc vita

Nostra dapibus varius et semper semper rutrum ad risus felis eros. Cursus libero viverra tempus netus diam vestibulum lorem tincidunt congue porta. Non ligula egestas commodo massa. Lorem non sit vivamus convallis elit mollis. Viverra sodales feugiat natoque sem morbi hac nunc ultricies nibh netus facilisis blandit. Felis purus et iaculis. Semper orci duis montes curabitur potenti a varius quis diam, vel litora et? Quis ridiculus pharetra luctus augue duis.

Parturient tortor tortor sed tellus molestie neque

Can cut the core of 75 mm Dia. Supplied complete with Barrel.

CORE DRILL BITS - DIAMOND IMPREGNATED. 100 mm DIA.

Can cut the core of 100 mm Dia. Supplied complete with Barrel.

Used to measure Thickness of all kind of Bitumen Layer.

As per IRC SP-11; 1977.

Used to measure irregularities in road pavements for controlling the surface evenness of roads. 3 mtr. Length with taper gauge.

TILES TESTING INSTRUMENTS

As per IS 1237 & 1706 for Cement Flooring Tiles.

TILES TESTING INSTRUMENTS

Tile Abrasion Test Apparatus

The Tile sample is pressed under a specified load against a grinding path strewn evenly with an abrasive powder revolving at the rate of 30 ± 1 revolutions per minute. At the end of 100 revolutions of the disc the second parallel side of the tile is subjected to wear for an equal number of revolutions of the disc.

The wear of the tile is measured using a thickness gauge.

Consists of a replaceable grinding path fitting on to a disc rotating its vertical axis. The rotating disc and grinding path are enclosed by a circular tray. A bracket holds the specimen. The loading is a counter balanced lever. A funnel is provided to facilitate charging the grinding path with abrasive powder. Supplied complete with an automatic pre-set revolution counter and one 7.5 kg weight but without abrasive powder and thickness gauge. Suitable for operation on 230 Volts, Single phase, AC supply

Porta tellus aliquam ligula sollicitudin

Lorem ipsum dolor sit amet, consectetur adipiscing elit, sed do eiusmod tempor incididunt ut labore et dolore magna aliqua. Ut enim ad minim veniam, quis nostrud exercitation ullamco laboris nisi ut aliquip ex ea commodo consequat.
” Lorem ipsum dolor sit amet, consectetur adipiscing elit, sed do eiusmod tempor incididunt ut labore et dolore magna aliqua. Ut enim ad minim veniam, quis nostrud exercitation ullamco laboris nisi ut aliquip ex ea commodo consequat. “

Tincidunt wisi euismod iaculis nunc vita

Nostra dapibus varius et semper semper rutrum ad risus felis eros. Cursus libero viverra tempus netus diam vestibulum lorem tincidunt congue porta. Non ligula egestas commodo massa. Lorem non sit vivamus convallis elit mollis. Viverra sodales feugiat natoque sem morbi hac nunc ultricies nibh netus facilisis blandit. Felis purus et iaculis. Semper orci duis montes curabitur potenti a varius quis diam, vel litora et? Quis ridiculus pharetra luctus augue duis.

Parturient tortor tortor sed tellus molestie neque

Unit for finding strength of clay roofing tiles and Cement Concrete flooring tiles.

The apparatus consists of two parallel self aligning cylindrical steel bearers about 40 mm in Diameter. The load is applied thru' a third steel bearer of similar shape placed midway between and parallel to the supports. Bearing rollers can be placed at 250 or 270 mm centre distance.

This is a lever Loading Machine and the load is applied by flow of lead shots, which automatically stops when the sample breaks. The load is applied at the rate of 45 to 55 kg per minute and the accuracy of load indication is ± 20%. Without Lead Shots

As per IS 654 - 1992.

A specially designed unit comprises of a plane plate with "L" shaped border and an adjustable stand with a Dial Gauge of 0.01 x 25 mm Travel to check the thickness of abrassed tile specimen of size 7.06 x 7.06 cm.

CONCRETE TESTING INSTRUMENTS

CONCRETE TESTING INSTRUMENTS

CONCRETE TESTING INSTRUMENTS

Compression Testing Machines. Digital. Four Pillar Model. 250 Kn.

For determination of compression strength of cement by testing cement cubes.
> Four Pillar Load Frame.
> Piston (Ram) & Cylinders are duly Hard Chromed.
> Electrically Operated on 440 Volts, three Phase & 50 Hz.

It has a capacity of 250 KN. Fitted with Digital Load Indicator having Capacity of 0- 250 KN with a least count of 1 KN.

Porta tellus aliquam ligula sollicitudin

Lorem ipsum dolor sit amet, consectetur adipiscing elit, sed do eiusmod tempor incididunt ut labore et dolore magna aliqua. Ut enim ad minim veniam, quis nostrud exercitation ullamco laboris nisi ut aliquip ex ea commodo consequat.
” Lorem ipsum dolor sit amet, consectetur adipiscing elit, sed do eiusmod tempor incididunt ut labore et dolore magna aliqua. Ut enim ad minim veniam, quis nostrud exercitation ullamco laboris nisi ut aliquip ex ea commodo consequat. “

Tincidunt wisi euismod iaculis nunc vita

Nostra dapibus varius et semper semper rutrum ad risus felis eros. Cursus libero viverra tempus netus diam vestibulum lorem tincidunt congue porta. Non ligula egestas commodo massa. Lorem non sit vivamus convallis elit mollis. Viverra sodales feugiat natoque sem morbi hac nunc ultricies nibh netus facilisis blandit. Felis purus et iaculis. Semper orci duis montes curabitur potenti a varius quis diam, vel litora et? Quis ridiculus pharetra luctus augue duis.

Parturient tortor tortor sed tellus molestie neque

For determination of compression strength of cement by testing cement cubes.
> Four Pillar Load Frame.
> Piston (Ram) & Cylinders are duly Hard Chromed.
> Electrically Operated on 440 Volts, three Phase & 50 Hz.

It has a capacity of 500 KN. Fitted with Digital Load Indicator having Capacity of 0500 KN with a least count of 1 KN.

As Per IS 516 - 1959.

For determination of compression strength of cement by testing cement cubes.
> Four Pillar Load Frame.
> Piston (Ram) & Cylinders are duly Hard Chromed.
> Electrically cum Hand Operated.
> The machine is equipped with facility for Hand pumping in case of power failure.
> Micro Switch is incorporated inside the Pressure Gauge to shut off the motor automatically as the load approaches the rated capacity, which prevents it getting damaged due to over load.
> Electrically Operated on 230 Volts, Single Phase & 50 Hz.

It has capacity of 250 KN. The Dial of Pressure Gauge is Graduated from 0 to250 KN with a least count of 1.25 KN.

As Per IS 516 - 1959.

For determination of compressive strength of cement by testing cement cubes.

> Four Pillar Load Frame.
> Piston (Ram) & Cylinders are duly Hard Chromed.
> The machine is equipped with Hand pump.

As Per IS 516-1959.

Laboratory Model, Light Weight laboratory Concrete Mixer is designed to remove the burdensome work of hand mixing. Uniform & thoroughly mixed batches can be produced in the field or laboratory.

The counter balanced mixing drum is easy to tilt. Two cubic ft. mix capacity. Total drum volume is 3 cubic ft. Mounted on a sturdy rubber typed stand. Drum is mounted for end discharge.

As Per IS 5891-1970 & IS 11386-1985.

Provided with a handle to rotate the drum. Suitable to mix 1 cu.ft. to 1.5 cu.ft. Material. Mounted on two rubber tyres.

As per IS 9013 - 1978.

It is developed to get the compressive strength of 28 days within short period by curing the concrete specimen by any of two methods namely warm-water method and boiling water method.

Double Walled. Outer Made of M.S. Inside made of S.S. With hinged Cover Lid. Long Heaters placed at the bottom. Can accommodate 6/12/24/36 moulds of 15 cm or 12/24/36/72 moulds of 7.06cm with concrete or mortar. Fitted with Microprocessor Based Dual Display Digital Temperature Indicator cum Controller. Temperature Range from 50°C to 100°C. Provided with water circulation arrangement to keep the temperature uniform. Overflow Nozzle is provided. Drain Cock for emptying tank is also fitted at the bottom. Operation on 230 Volts, Single Phase.

For curing 06 Nos. of 150 mm Cube Moulds or 12 Nos. of 70.6 mm Cube Moulds

As per IS 9013 - 1978.

It is developed to get the compressive strength of 28 days within short period by curing the concrete specimen by any of two methods namely warm-water method and boiling water method.

Double Walled. Outer Made of M.S. Inside made of S.S. With hinged Cover Lid. Long Heaters placed at the bottom. Can accommodate 6/12/24/36 moulds of 15 cm or 12/24/36/72 moulds of 7.06cm with concrete or mortar. Fitted with Microprocessor Based Dual Display Digital Temperature Indicator cum Controller. Temperature Range from 50° C to 100° C. Provided with water circulation arrangement to keep the temperature uniform. Overflow Nozzle is provided. Drain Cock for emptying tank is also fitted at the bottom. Operation on 230 Volts, Single Phase.

For curing 12 Nos. of 150 mm Cube Moulds or 24 Nos. of 70.6 mm Cube Moulds.

As per IS 9013 - 1978.

It is developed to get the compressive strength of 28 days within short period by curing the concrete specimen by any of two methods namely warm-water method and boiling water method.

Double Walled. Outer Made of M.S. Inside made of S.S. With hinged Cover Lid. Long Heaters placed at the bottom. Can accommodate 6/12/24/36 moulds of 15 cm or 12/24/36/72 moulds of 7.06cm with concrete or mortar. Fitted with Microprocessor Based Dual Display Digital Temperature Indicator cum Controller. Temperature Range from 50° C to 100° C. Provided with water circulation arrangement to keep the temperature uniform. Overflow Nozzle is provided. Drain Cock for emptying tank is also fitted at the bottom. Operation on 230 Volts, Single Phase.

For curing 24 Nos. of 150 mm Cube Moulds or 48 Nos. of 70.6 mm Cube Moulds.

Used to determine the slump of fresh concrete as a measure of its consistency.

Consists of a slump cone fitted with handles and foot pieces in position. Base plate in octagonal shape two clamps slide over the foot grips of standard slumps cone and hold it securely while fitting and rotting. Provided with a combination swivel-carrying handle. Complete with graduated tamping rod 0-60 cm long and 16 mm Dia with 0- 30 cm scale graduations.

As Per IS 7320-1974 & IS 1199-1959.

For compaction of concrete Cubes, Cylinders & Beams.

The table deck has stops along its edges to prevent moulds from walking off the table during operation. The variable pitch pulley arrangement permits the frequency to be varied step-less between a maximum of 3600 vibrations down to 2600 vibrations per minute. A speed regulation handle is provided for increasing or decreasing the frequency. The vibrator is mounted on cushioned Steel vibrating deck. A switch is provided for starting the motor. Operation on 440 V, three phase, AC supply.

As Per IS 2514 - 1963.

NON DESTRUCTIVE TESTING INSTRUMENTS

CONCRETE TESTING INSTRUMENTS

NON DESTRUCTIVE TESTING INSTRUMENTS

Cover Meter

Confirms to BS 1881-204.

For measuring the thickness of concrete cover over steel reinforcement bars and metal pipes.

The COVER METER boasts one of the best measurement accuracy features available today. With the COVER METER – Cover Meters, you can be safe in the knowledge that the readings you take are accurate and precise. The focused search heads enable an accurate measurement in congested situations, giving you the detailed information you need for your site survey.

The class leading resolution of the BARTRACKER Cover meters allow you to achieve accurate readings when there is a minimal distance between rebars. With the choice of extra search heads available as options, which are easily interchangeable and are automatically recognised by the unit, the BARTRACKER can deliver the results you need quickly,

easily and accurately.

Using the optional Borehole Probe you can extend the COVER METER measurement range to locate and orientate additional layers of rebar and tendons up to 100 cm/40″ below the surface. Bar diameter ranges: Metric: 550 mm bar diameters in 21 values.

US bar numbers: #2 #18 bar sizes in 16 values Rechargeable power supply: 7.4V lithium ion battery pack provides up to 32 hours of continuous use (20 hrs if backlight on). Rechargeable in 4 hrs either inside or outside the gauge using external charger. Maximum Operating Temperature: 50°C / 122°F. Unit dimensions: 230 x 130 x 125 mm / 9 x 5,1 x 4,9 Unit weight: 1.54 kg / 3.4 lbs

Porta tellus aliquam ligula sollicitudin

Lorem ipsum dolor sit amet, consectetur adipiscing elit, sed do eiusmod tempor incididunt ut labore et dolore magna aliqua. Ut enim ad minim veniam, quis nostrud exercitation ullamco laboris nisi ut aliquip ex ea commodo consequat.
” Lorem ipsum dolor sit amet, consectetur adipiscing elit, sed do eiusmod tempor incididunt ut labore et dolore magna aliqua. Ut enim ad minim veniam, quis nostrud exercitation ullamco laboris nisi ut aliquip ex ea commodo consequat. “

Tincidunt wisi euismod iaculis nunc vita

Nostra dapibus varius et semper semper rutrum ad risus felis eros. Cursus libero viverra tempus netus diam vestibulum lorem tincidunt congue porta. Non ligula egestas commodo massa. Lorem non sit vivamus convallis elit mollis. Viverra sodales feugiat natoque sem morbi hac nunc ultricies nibh netus facilisis blandit. Felis purus et iaculis. Semper orci duis montes curabitur potenti a varius quis diam, vel litora et? Quis ridiculus pharetra luctus augue duis.

Parturient tortor tortor sed tellus molestie neque

Concrete Test Hammer type "N" classic Model, Aluminium Case.

It is used for the non-destructive testing of the surface hardened concrete in order to evaluate the strength in various part of a structure.

During operation plunger of the operation is passed against the surface of the concrete. This action compresses a spring, which automatically releases a percussion weight striking against the plunger and onto the surface of concrete. This impact causes a rebound effect, which is proportional to the strength of concrete. A pointer on the scale indicates the maximum rebound point of percussion weight.

This number is referred to the calibration curve chart on the hammer and shows the compressive strength in relation to the impact value. The concrete hammer is supplied complete with plastic carrying case, grinding stone and instruction manual.

As Per BS 1881:203, ASTM C 597, NF P18-418, UNI 9524, pr EN 12504:Part 4.

To measure the velocity of propagation of Ultrasonic pulses through a rock sample in the laboratory and to compare the results of similar measurements on site. The instrument works by generating an ultrasonic pulse, which is passed through the rock sample (generally cylindrical samples) with a generating probe kept pressed against the plane surface of the sample.

The pulses are recorded by a receiving probe that is also pressed against the plane surface, opposite and parallel to the first one. The instrument displays the time to penetrate the rock sample along the longitudinal axis; since the distance between the probes is measured the velocity of the ultrasonic pulses can be calculated.

> Microprocessor incorporated.
> RS 232 output.
> Connectable to oscilloscope.

Transit Time Measurement: 0 to 1999.9 με.
Pulse Rate: From 1 to 10 per second, selectable.
Accuracy: 0.1 μς.
Transmitter Output: 800 v.
Frequency Range: 24 to 150 kHz.
Power Supply: No. 2 D size 1.5 V Battery or as alternative, No. 2 D size 1.2 V rechargeable Models.
Battery Life: 18 working Hours.
Dimension. 138 x 80 x 200 mm.
Weight Approx. Net 1.1 kg. Complete set 2.9 kg.

The tester is supplied complete with Two 54 kHz Transducers (Transmitter and receiver) with 2 mtr cable, Calibration Rod, Coupling Agent (250 cc Bottle) & Nylon Carrying Case.

For Site testing the tester can be used in its carrying case providing an ergonomic position of both keypad and display.

ROCK TESTING INSTRUMENTS

As Per IS 8764-1978.

ROCK TESTING INSTRUMENTS

Point Load Index Tester.

Used for testing rock, aggregate and core samples as out crop specimen in their original shape. Very useful for rock

classifications. This is a portable instrument and is useful in the field also. Uniaxial Compressive Strength for rock specimen can also be predicted approximately.

The instrument comprises of a three pillar type load frame on the base of which at the center is fixed a 10 Tonne capacity hydraulic jack with a conical platen at the top of jack. The other conical platen is fixed to the top plate of the frame at its centre. The distance between two conical platen is fixed to the top plate of the frame at its center.

The distance between two conical platens is adjustable by vertical movement of the upper plate of the load frame. Loading Jack with integral hand operated pump and a Pressure Gauge 0-2500 kg x 25 kg.

Porta tellus aliquam ligula sollicitudin

Lorem ipsum dolor sit amet, consectetur adipiscing elit, sed do eiusmod tempor incididunt ut labore et dolore magna aliqua. Ut enim ad minim veniam, quis nostrud exercitation ullamco laboris nisi ut aliquip ex ea commodo consequat.
” Lorem ipsum dolor sit amet, consectetur adipiscing elit, sed do eiusmod tempor incididunt ut labore et dolore magna aliqua. Ut enim ad minim veniam, quis nostrud exercitation ullamco laboris nisi ut aliquip ex ea commodo consequat. “

Tincidunt wisi euismod iaculis nunc vita

Nostra dapibus varius et semper semper rutrum ad risus felis eros. Cursus libero viverra tempus netus diam vestibulum lorem tincidunt congue porta. Non ligula egestas commodo massa. Lorem non sit vivamus convallis elit mollis. Viverra sodales feugiat natoque sem morbi hac nunc ultricies nibh netus facilisis blandit. Felis purus et iaculis. Semper orci duis montes curabitur potenti a varius quis diam, vel litora et? Quis ridiculus pharetra luctus augue duis.

Parturient tortor tortor sed tellus molestie neque

Concrete Test Hammer type "N" classic Model, Aluminium Case.

It is used for the non-destructive testing of the surface hardened concrete in order to evaluate the strength in various part of a structure.

During operation plunger of the operation is passed against the surface of the concrete. This action compresses a spring, which automatically releases a percussion weight striking against the plunger and onto the surface of concrete. This impact causes a rebound effect, which is proportional to the strength of concrete. A pointer on the scale indicates the maximum rebound point of percussion weight.

This number is referred to the calibration curve chart on the hammer and shows the compressive strength in relation to the impact value. The concrete hammer is supplied complete with plastic carrying case, grinding stone and instruction manual.

As Per BS 1881:203, ASTM C 597, NF P18-418, UNI 9524, pr EN 12504:Part 4.

To measure the velocity of propagation of Ultrasonic pulses through a rock sample in the laboratory and to compare the results of similar measurements on site. The instrument works by generating an ultrasonic pulse, which is passed through the rock sample (generally cylindrical samples) with a generating probe kept pressed against the plane surface of the sample.

The pulses are recorded by a receiving probe that is also pressed against the plane surface, opposite and parallel to the first one. The instrument displays the time to penetrate the rock sample along the longitudinal axis; since the distance between the probes is measured the velocity of the ultrasonic pulses can be calculated.

> Microprocessor incorporated.
> RS 232 output.
> Connectable to oscilloscope.

Transit Time Measurement: 0 to 1999.9 με.
Pulse Rate: From 1 to 10 per second, selectable.
Accuracy: 0.1 μς.
Transmitter Output: 800 v.
Frequency Range: 24 to 150 kHz.
Power Supply: No. 2 D size 1.5 V Battery or as alternative, No. 2 D size 1.2 V rechargeable Models.
Battery Life: 18 working Hours.
Dimension. 138 x 80 x 200 mm.
Weight Approx. Net 1.1 kg. Complete set 2.9 kg.

The tester is supplied complete with Two 54 kHz Transducers (Transmitter and receiver) with 2 mtr cable, Calibration Rod, Coupling Agent (250 cc Bottle) & Nylon Carrying Case.

For Site testing the tester can be used in its carrying case providing an ergonomic position of both keypad and display.

CEMENT TESTING

As Per IS 8764-1978.

CEMENT TESTING

Various tests to which cements must conform are laid down in national cement specifications to control the fineness, soundness, setting time, and strength of the cement. These tests are described in turn below.

Consistency

The basic aim is to find out the water content required to produce a cement paste of standard consistency as specified by the IS: 4031 (Part 4) 1988. The principle is that standard consistency of cement is that consistency at which the Vicat plunger penetrates to a point 5-7mm from the bottom of Vicat mould.

Apparatus – Vicat apparatus conforming to IS: 5513 1976, Balance, whose permissible variation at a load of 1000g should be +1.0g, Gauging trowel conforming to IS: 10086 1982.

Porta tellus aliquam ligula sollicitudin

Lorem ipsum dolor sit amet, consectetur adipiscing elit, sed do eiusmod tempor incididunt ut labore et dolore magna aliqua. Ut enim ad minim veniam, quis nostrud exercitation ullamco laboris nisi ut aliquip ex ea commodo consequat.
” Lorem ipsum dolor sit amet, consectetur adipiscing elit, sed do eiusmod tempor incididunt ut labore et dolore magna aliqua. Ut enim ad minim veniam, quis nostrud exercitation ullamco laboris nisi ut aliquip ex ea commodo consequat. “

Tincidunt wisi euismod iaculis nunc vita

Nostra dapibus varius et semper semper rutrum ad risus felis eros. Cursus libero viverra tempus netus diam vestibulum lorem tincidunt congue porta. Non ligula egestas commodo massa. Lorem non sit vivamus convallis elit mollis. Viverra sodales feugiat natoque sem morbi hac nunc ultricies nibh netus facilisis blandit. Felis purus et iaculis. Semper orci duis montes curabitur potenti a varius quis diam, vel litora et? Quis ridiculus pharetra luctus augue duis.

Parturient tortor tortor sed tellus molestie neque

we need to determine the fineness of cement by dry sieving as per IS: 4031 (Part 1) 1996. The principle of this is that we determine the proportion of cement whose grain size is larger then specified mesh size.

The apparatus used are 90µm IS Sieve, Balance capable of weighing 10g to the nearest 10mg, A nylon or pure bristle brush, preferably with 25 to 40mm, bristle, for cleaning the sieve.

The Specific gravity defined as the ratio between the weight of given volume of the cement and weight of an equal volume of water. The most popular method of determine S.G of cement is by use of the kerosene which doesn't react with cement.

The setting and hardening of a cement is a continuous process, but two points are distinguished for test purposes. The initial setting time is the interval between the mixing of the cement with water and the time when the mix has lost plasticity, stiffening to a certain degree. It marks roughly the end of the period when the wet mix can be molded into shape.

The final setting time is the point at which the set cement has acquired a sufficient firmness to resist a certain defined pressure. Most specifications require an initial minimum setting time at ordinary temperatures of about 45 minutes and a final setting time no more than 10 to 12 hours.

It is the property of cement due to which it undergoes large change in volume after setting. This change in volume may cause crack and disintegration of concrete. To check the soundness of cement Le-Chatlier's apparatus is used.

Compressive strength of cement indicates the compressive strength of cement mortar cubes (7.07cmx7.07cmx7.07cm) of 1:3 proportion, using standard sand as specified by IS:650 (1966) as fine aggregate, tested under compression (Grade of cement indicates their compressive strength at the end of 28 days of curing).

Many other properties of mortar / concrete are related to compressive strength of cement, because cement is used in structure in the form of mortar or concrete.

Concept Structure:

Visit Us

Get a Quote